• Training
    • Injury Prevention
    • Training Tips
  • How To
    • Bike Fit
    • Gear
  • Nutrition
    • Nutrition Tips
    • Weight Loss
  • Repair
  • Reviews
  • Stories
    • Funny Stories
    • Jokes
    • Quotes
    • Videos
    • Funny Videos

I Love Bicycling

I Love Bicycling is a website that is geared towards cycling for beginners with road cycling tips, training articles, nutrition tips, weight loss, how to’s and bike repair articles.

Search Results for: interval

Cycling Intervals: The 2×20 Workout

January 16, 2020 by Aaron Robson

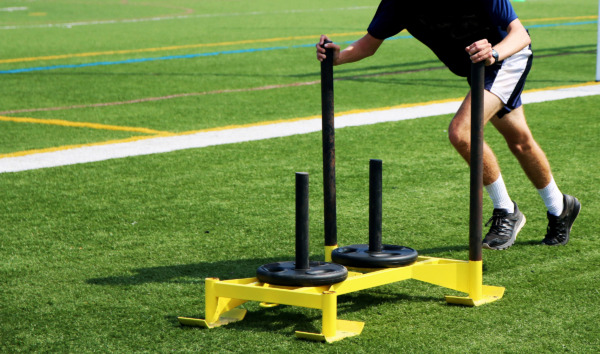
If you are looking for that killer workout that will take you to the next level in your biking, chances are, we have what you are looking for. Most training books will refer to this workout as 2x20s, but most cyclists tend to refer to it using some variation on the words ‘pain’, ‘torture’ and ‘excruciating’. Never fear though, you are made of tougher stuff than most, and a little pain goes a long way!

2x20 intervals - An Aerobic Power Workout

The Benefits of Interval Training

The benefits of interval training are numerous, which is why it has been a mainstay technique used by  fitness professionals throughout the world, in addition to a lot of cyclists.

Efficiency – Interval training is designed to get you the best results in the shortest amount of time, so you will find that you end up spending a lot less time on your workouts.

Fat Burning – The intense effort required in an interval training program means that you will burn a lot of fat much more quickly than you would with standard riding. You also boost your body’s repair cycle during interval training, which means that you will lose more calories and fat following the completion of the workout than you would after a standard ride.

No Equipment Needed – One of the main sticking points of going to the gym to build power is that you need to use equipment other than your bike. In doing so you aren’t improving your technique and you’re often spending money to get results. Interval training just needs you and your bike to get the job done.

Challenge – No workout is going to keep your attention for long if it doesn’t offer a challenge and, even worse, it will start to lose its effectiveness if you find you can do it easily. Interval training is never anything less than a challenge, especially because intervals can often be scaled up to become harder as your body improves.

2×20 Cycling Intervals

Here is what you will need:

  • Yourself
  • Your bike
  • A place where you can bike without having to stop for at least 20 minutes (I often use a 1-2 mile loop course for this)

The workout is fairly self-explanatory – you are going to ride two 20 minute efforts. In between is a 3-5 minute slow recovery pedal. You will want to pace your effort such that you maintain a steady pace throughout the first effort that leaves you feeling pretty tired, but knowing you held back a bit. For the second effort, you still want it to remain relatively even paced, but you should be about as close to falling over as you can push yourself. If you’ve done things right, your efforts should be about the same pace (or power level, if you happen to be using a power meter).

Why is this workout so beneficial? For starters, it is going to make you tough. The more times you do this, the harder you will be able to push yourself in that second leg, and that will translate directly to endurance at the end of a race.

Why It Works

To look at things a bit more technically, this workout targets what physiologists call your Functional Threshold Power, which refers to the maximum effort level you can maintain before lactic acid production begins to sharply increase. In simple terms, it is about the level you can maintain for an all-out 1 hour effort. Why is this so important? Well even if you don’t race in time trials very often, increasing your FTP means that any given aerobic effort will be easier. This allows you to recover faster after a hard surge in a race, or have more left in the tank for a final sprint after the pace ratchets up in the last few kms of a race. All of that sounds pretty damn good, doesn’t it? What are you waiting for?

Great Interval Training Cycling Workouts

August 7, 2015 by U.M.

interval training cycling workoutsInterval training. It’s a phrase that sends shudders through the spines of anybody who has tried it before, but the simple fact is that there is no better way to improve your fitness and strengthen what you need to strengthen in such a short amount of time.

If you can stick with it, interval training cycling workouts will do wonders for helping you to develop the power and speed that you need to really make an impression in any event you choose to cycle in. Plus, you’ll burn plenty of fat and build some muscle along the way. Here we take a look at some of the benefits of interval training and a few exercises you should try.

Benefits of Interval Training

Fat Burning – Interval training is made up of high intensity cycling workouts, which means you will burn a lot more fat off your body than if you simply head out and ride at your normal pace for an hour or two. They are designed to push you to your limit and your body will burn extra calories while you do it.

Efficiency – Interval training cycling workouts get better results faster than practically every other training method out there. The routines of high intensity working out followed by rest periods help you to build your cardio and improve your fitness much more quickly than a leisurely bike ride ever will.

Variety – There are so many great interval training cycling workouts out there that you will never get bored repeating the same exercises over and over again. Better yet, most of them are tailored to improve a particular area of your cycling game, so you can pick and choose the ones that are right for you.

Great Interval Training Workouts

So now you know a little bit more about the benefits of interval training cycling workouts, we’re willing to bet that you want to give it a crack. The following are some great workouts that beginners and interval training enthusiasts alike can try out.

Attack Intervals – Have you ever found yourself in the middle of an attack, only to find your legs are running out of steam and you haven’t gotten where you want to go? Attack intervals help you work on that aspect of your cycling. All you need to do is ride as hard and fast as you can for three minutes, before taking a break and riding at an easier pace for two. Repeat the process three times and the workout is complete. You’ll break your speed and endurance thresholds in no time.

Hill Repeats – Hills are the bane of any competitive cyclist’s existence, but they need to be tackled like every other part of the course. You can give yourself an advantage with hill repeats so that you have that extra bit of power and stamina to get over the bump and keep pushing on. Cycle to a moderate incline and then do a standing charge as fast as you can for 30 seconds. Coast back to your starting point and do the same again but seated. Repeat this two more times for each type of charge, recover for ten minutes, then do it all over again.

Flying 40s – In events where you will be making multiple, high-speed pushes, a good mix of endurance and power is needed. This workout requires you to set your bike to a medium or hard gear and then push hard for 40 seconds, before recovering for the next 20 with a slow cadence. Repeat this 10 times and the rest for five minutes before doing it all over again. If you can get to four sets you’re doing very well.

Enjoy some of the interval training cycling workouts! Which training workout is your favourite?

Interval Training For Cyclists

July 30, 2015 by U.M.

interval training, high intensity interval training, cycling workoutsIn their quest to improve both stamina and speed, most cyclists will try out a number of training regimes before they find the one that gets the results that they want from the workout.

Many head to the gym to work with weights in an effort to build their power, however, there are a number of ways that you can train using your bike alone, so that you get all of the cardio benefits in addition to making gains in your cycling technique. One of the key training methods that many modern cyclists espouse is interval training.

What Is Interval Training?

You have probably heard the term interval training before, as the general concept can be applied to many different types of exercise. It is essentially the idea that exercising intensely for short, sharp bursts, with adequate rest periods in between, it is a more efficient way to boost your strength and overall fitness.

The theory can be applied to cycling just as readily as it can to many other types of workout, as there are many different interval training techniques that you can use to improve your speed, cadence and power levels.

What Does Interval Training Do?

Interval training is designed to get you at your peak levels of speed, strength and stamina as quickly as possible by making use of special exercises that focus on a particular area of your riding.

As such, it is always best to conduct interval training on a bike that you feel comfortable on and in optimal conditions for riding. Smooth surfaces are a must, as you will be focusing on maintaining consistency and good form in an effort to improve your overall technique.

And that’s what it comes down to. Interval training forces you outside of your comfort zone for short periods of time, while also calling upon you to maintain the technique that you need to really make gains in your cycling.

What Are The Benefits of Interval Training?

The benefits of interval training are numerous, which is why it has quickly been adopted by many fitness professionals throughout the world, in addition to a lot of cyclists.

Of the many advantages, the below are the four that are likely going to be most appealing to the average cyclist.

Efficiency – Interval training is designed to get you the best results in the shortest amount of time, so you will find that you end up spending a lot less time on your workouts.

Fat Burning – The intense effort required in an interval training program means that you will burn a lot of fat much more quickly than you would with standard riding. You also boost your body’s repair cycle during interval training, which means that you will lose more calories and fat following the completion of the workout than you would after a standard ride.

No Equipment Needed – One of the main sticking points of going to the gym to build power is that you need to use equipment other than your bike. In doing so you aren’t improving your technique and you’re often spending money to get results. Interval training just needs you and your bike to get the job done.

Challenge – No workout is going to keep your attention for long if it doesn’t offer a challenge and, even worse, it will start to lose its effectiveness if you find you can do it easily. Interval training is never anything less than a challenge, especially because intervals can often be scaled up to become harder as your body improves.

So what do you think? Is interval training for you?

Interval Training: Why It Works

April 23, 2014 by U.M.

Interval Training: Why It Works

interval training why it works
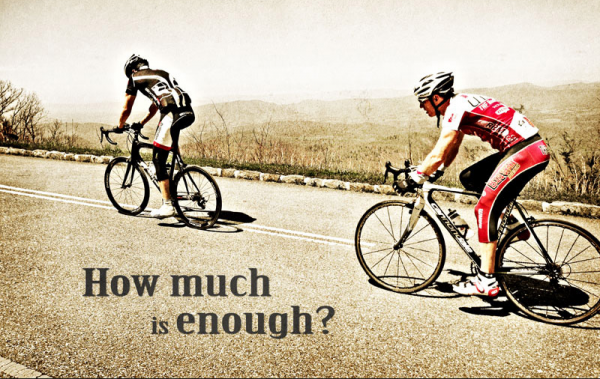
A number of athletes turn to interval training in order to improve their performance. Interval training involves periods of high-intensity riding that alternate with low-intensity rest periods. The purpose of interval workouts is to improve a cyclist’s speed/power as well as his or her level of endurance. Here is a look at precisely what interval training does and why it works. [Read more…]

A Beginner’s Guide to Handlebar Tape

June 5, 2020 by Sarah Lauzé

Handlebar tape is an often overlooked aspect of your bike, but it effects both how your bike looks and feels. It covers the essential contact point between you and and your bike, so it’s the easiest way to make your bike feel like new. The tape will work to absorb some of the bumps in the road, as well as provide grip for your hands. Historically, handlebars were wrapped in simple white cloth tape, but now there are a ton of options when it comes to material and colour. So, if you’re looking for a way to spend some quality time with your bike, changing your handlebar tape can be a great way to do it.

How often should you replace handlebar tape?

Cyclists know that certain items, tires, chains, and gears should be replaced at regular intervals, but how often should you replace your bar tape? This will be dependent on how much you ride, but it should be done at least a once a year. Think of how much your hands sweat out on a hot ride, or the dirt and dust from the road making it’s way to your handlebars. It can get pretty nasty looking, especially if it’s white, so you’ll want to make a habit of changing it out.

What to look for in handlebar tape

Grip

Handlebar tape does more than just make your bike look good, it serves as your main point of contact. So, it’s important to choose tape that provides adequate grip for the handling of your bike. Look for something with a tacky finish to ensure you get grip even in wet conditions. This is especially important if you are riding without gloves.

Padding

Handlebar tape provides a nice bit of cushioning for your hands, reducing the vibrations that travel from the road up into your arms. Choose tape that provides the right amount of padding for you and the type of riding you do. Many cyclists choose to double wrap their bars for a little extra cushion, especially when riding on rougher roads.

Looks

There are all sorts of unspoken rules out there. Some say your bar tape should match your saddle, or your kit, or your head tube…the list goes on. The truth of it is, you should chose whatever tape feels the best in a colour that catches your eye.

Types of Handlebar Tape

Bar tape is prone to wear and tear, but luckily most is relatively inexpensive. There are plenty of options to explore too, and new tape will always rejuvenate a tired-looking bike. It’s worth experiencing the subtle differences in comfort, feel, and performance offered by different brands and materials.

Cotton Bar Tape

Cotton is old-school. Any bike built before about 1985 probably has cotton bar tape. Cotton tape is very cheap but it’s not widely available, and your best bet may be to go shopping online for it. Cotton tape comes in a roll with an adhesive backing that is easy to apply to a clean set of bars. Cycling purists like to give cotton tape several coats of shellac to protect the material and prevent it from unwrapping. That’s why some older bikes seem to have shiny handlebars.

Cork/Synthetic Bar Tape

By 1987, cork tape had for the most part replaced cotton as the tape of choice. Contemporary cork tape is actually a synthetic blend of cork and ethylene vinyl acetate. Cork/synthetic tape is more expensive than cotton, but typically also comes with a with a small strip of adhesive backing. Cork/synthetic tape needs to be stretched carefully when wrapping the bars, otherwise it looks untidy and is prone to unravelling. Take care with cork blends, stretch them too tight and they will break. Cork tape is typically too thick for designs such as the harlequin or other pattern making. The main advantage of cork is that it absorbs shock and sweat like nothing else.

High-Tech Bar Tape

Most contemporary bar tapes are made from a lightweight and durable synthetics, in combination with a foam or gel core for cushioning. Materials such as polyurethane, synthetic nylon or silicone are strong, lightweight and durable and often have a tacky  texture that aids grip and contributes to a positive feel to your hands. Some have a perforated surface, others a ‘microfiber’ smooth feel, while others have a textured surface. Some look like faux leather or faux carbon. These newer formulas add good vibration dampening, without the bulkiness that can come from old-school tapes like cork.

Leather Bar Tape

If you’ve ever heard of the Brooks saddle you won’t be surprised that leather bar tape is at the top of the heap. Leather tape just feels good in your hands. Expect to pay around $100 for leather handlebar tape. You can also expect it to last forever. Some cyclists claim that it improves with age, just like a Brooks saddle. If you’re into changing the tape every year as suggested, leather probably isn’t the best choice. The downside to leather is that it doesn’t provide a vibration dampening effect like cork or gel.

How To Change Your Handlebar Tape

Bar tape can last for years, and it typically comes already installed on a new bike. It might seem easy enough; wrapping tape around bars. But it’s not that simple. Not all cyclists know how to wrap a bar and make it last. In fact, it’s one of the most common things done wrong on bicycles.

What You’ll Need

  • Electrical tape
  • Scissors
  • Clean hands or gloves
  • New handlebar tape

1. Remove Old Handlebar Tape

Do whatever it takes to remove the old bar tape. It might just unravel when you remove the plugs, or you can use tweezers or pliers to grip it an pull it off delicately.

2. Clean the Bars

Use a bike specific cleaner or anything that will remove tacky substances. Make sure it’s dry and without any residue to ensure a good bond with your handlebars.

3. Make Adjustments & Secure Cables

If you’re replace existing tape, the hoods should already be in the right position, but this is your chance to move them if you desire. Make the adjustments, and tighten the hoods to the handlebars. It’s typically done with a 5mm hex wrench. The bolt is usually on the outside of the lever under the hood. Its a good idea to ride the bike before applying the tape, to ensure the hoods are where you want them, because after wrapping the bars, they’re difficult to move without disturbing the tape.

Use black electrical tape to secure the brake cables to the bars if applicable. Some bars have holes in them for this purpose, and you can skip the electrical tape. It typically takes 3 or 4 strips of electrical tape to secure the brake line to drop bars.

4. Wrap It

The jury is still out on the direction, and whether to wind clockwise or counterclockwise is up to you. Some prefer to start in the center, on either side of the handlebars. Some prefer to anchor the tape with the plugs, and work toward the handlebars. Because the procedure varies wildly due to your choice of designs, the procedure can also vary.

In general, the most popular technique is to start at the end of the bars leaving about a half-inch overhanging the end of the bars. This is so you stuff it inside the bars when you insert the bar-end plug to secure it. Then start wrapping the bar tape leaving about 1/4 of an inch to a half overlapping the previous. Make sure you keep it snug as you go. When you get to the hoods there are a few ways to do it, but in general, you want to make sure that no metal on the bars is showing. Then continue toward the stem stopping two to three inches from the stem. Cut the tape so it forms a straight edge and wrap a few layers of electrical tape around the end to secure it. Then the nice tape that generally comes with new bar tape can be wrapped over the electrical tape giving it a sleek look.

How to Lose Weight Cycling: The Essentials

February 23, 2020 by Sarah Lauzé

Your bike, when put to good use, may just be the best tool you have to lose weight. Whether you’re just starting out and looking to cycling as a means to a healthier lifestyle, or are a veteran cyclist, there are a lot of reasons you may be looking to lose weight cycling.

Shaving off the pounds can make you faster, boost your confidence, and impact almost every part of life. Just make sure you are putting your well-being first. If you are working towards a weight goal, ensure that is it one that will actually improve your overall health and fitness.

Why Cycling?

So, why chose to lose weight cycling over other means? Running is known for being on of the more effective way to burn calories, but is also a high impact sport. Especially if you live in a city and are running on roads, each step sends impact through your feet, ankles, calves, knees, and onward. This can make it a difficult activity to start if you have previous injuries, and you can be at risk of overuse injuries (which increases the heavier you are).

Cycling, on the other hand, is a low impact activity that like running, you can do almost anywhere. It’s also a ton of fun! Biking is all about the legs, but it’s also a cardiovascular exercise that burns a ton of calories. Weight loss comes down to burning more calories than you are taking in, causing your body to use energy stores. Plus, as you strengthen your muscles cycling, you’ll also be building up oxygen delivering capillaries. With oxygen running through your body at a faster rate, your metabolism will speed up and start to eat away at fat cells, resulting in weight loss.

Lose Weight Cycling

Steps to get started

Make a plan not a goal

Goals can be a great motivating tool, but without the plan to get there, they will remain out of reach. You need to get specific and lay it out in a way that makes sense to you. This could be a simple as riding your bike to work three days out of the week or putting in a couple hundred miles.

Be realistic with yourself and your schedule. If your plan is too demanding in the start, you probably won’t stick with it, but if it’s too easy you won’t see results. Can’t find time to commute or ride in the evenings? Try a lunch hour spin class. For more information check out this article: The Benefits Of Having A Cycling Training Plan.

Find your moderate base pace

Starting out you will want spend most of your time on the bike at 68-79 percent of your max heart rate. If you don’t want to fuss about measuring it with a heart rate monitor, then aim for a pace that leaves you out of breath, but still able to carry on a conversation (no gasping). Great, now hang out there.

You shouldn’t be so drained at the end of the ride that you won’t want to head out again, enjoy it! Once you’ve established your base, then you’ll want to introduce some variety to your rides in the form of intervals or high intensity sessions.

Lose Weight CyclingDiet

Your diet is the sum of the food you consume, and as you probably already know it is a huge factor in weight loss. Ignore what the latest fad is, it all comes down to nutrition and fueling your body with the right amounts of the right things. Just because you are going for ride after work does not mean you should carb load.

Carbohydrates need to support your cycling routines, not hinder them. The reality is that too large a portion can lead to peaks and dips in energy that can actually leave you feeling lethargic. A good rule of thumb is to aim to eat a fist-sized portion of low-glycaemic carbohydrates to ensure that you get a steadier release of energy as you ride.

Weight loss is a simple concept: More calories out than in. So, keep your diet simple. Eat a balanced, healthy diet, control your portion size, and cut out unnecessary snacking and you will be well on your way.

Don’t fear the hills

Going up a hill takes a lot more energy than riding on a flat surface. This will cause you to use up extra calories in a shorter period of time. So, hills are actually your friend!

Embrace the cycling communityLose Weight Cycling

Accountability is important for everyone, but it’s not something you should dread. Finding a cycling partner or joining a weekly group ride not only ensures you show up, but it’s also a great way to meet people. So, head down to your local bike shop and find out how you can get involved.

Enjoy it!

Cycling is fun above all else, so make sure you keep it that way! Think of it as a part of your day you’re looking forward to, rather than something you have to do to lose weight. The more you enjoy it, the more likely you’ll be to stick with it for the long haul.

Heart Rate Zone Training for Cyclists

January 28, 2020 by Sarah Lauzé

Heart Rate Zone Training for CyclistsHeart rate zone training is one of the most effective ways to get to know your body and what you’re capable of. It’s easy to stop doing something when it’s hard, especially if you don’t have a tangible goal. Using your heart rate zones, you can push yourself further than you may think possible, while also ensuring you aren’t overtraining.

As a cyclist, you always want to be improving. Whether you’re aiming for a 100 mile race or want to keep up on group rides, making the most of your time in the saddle will get you there. Here are some sample training sessions, using heart rate zones, to increase your efficiency and get you flying up those hills.

If you are unfamiliar with the heart rate zones, please first go read this article on how to determine your perimeter beats per minutes and define your zones from there.

The long slow distance

3-4 hours in Zones 1-2

Breakdown: This one is pretty self explanatory. Plan out a long distance ride with moderate climbing, and be sure to stay in HR zones 1-2, even if this means getting into your climbing gear earlier than you usually would.

Everybody loves LSD! And no, I’m talking about the drug. The long slow distance ride is your entry into heart rate (HR) training, and the perhaps the most overlooked because let’s be real, it can seem slow and boring. It’s hard to be disciplined enough to stay in these lower zones, but it will pay off in the long run. It seems counterintuitive, but these relaxed rides build up your endurance and overall fitness, and will make your faster.

It may be a good idea to ride alone for these ones to avoid your more competitive side getting in the way. Sit back, enjoy the scenery, and spin those legs!

The high intensity intervals

40 minutes in zones 1-7

Breakdown: 10 minute warmup (zones 1-2)

3 sets of 4 x 30 second sprints (zone 5) with 40 second recovery (zone 1-2)

5 minute cool down (zone 1-2)

No pain no gain, right? This ride is short, but it will burn fat, improve endurance, and increase your overall fitness. Intervals may not be a whole lot of fun, but if you mentally prepare yourself, the pain really doesn’t last that long. Take it one interval at a time, and make the most of the rests in between!

A little bit of both

2 hours in zones 2-3 with zone 4 intervals

Breakdown: 50 minutes (zone 1-2)

10 minute sprint (zone 4)

40 minutes (zones 1-2)

10 minutes (zone 4)

10 minute cool down (zone 1-2)

Heart Rate Zone Training for Cyclists

It’s all about endurance. This ride will build both your strength and endurance over time, and the ten minute sprints are actually a whole lot of fun. Don’t cheat yourself, but stay focused and within the zones if possible. If you’re just starting out, try two hours in zone 3 instead, and work up to this ride.

Keep in mind, the more riding you do, the better you’re going to get. Even if you do the same ride twice, it may take you more effort to get into the different zones than it did before as your body becomes more efficient. Once you reach a certain level of fitness, many cyclists tend to plateau, but using HR zone training you can avoid this and keep pushing yourself each and every ride.

Benefits of Indoor Trainer Workouts

January 7, 2020 by Dyani Herrera

One of the many joys of cycling is the youthful sense that you’re “playing” outdoors, as you ride and take yourself through the environment. However, at times life obligations or the environment can hinder your training plan forcing you to adapt your workouts. Bike trainers are a great way to fit in an effective workout, and there are several advantages of using a trainer that will enhance your skills as a cyclist.

Benefits of Trainer Workouts

Benefits of Indoor Trainer Workouts

Mental Endurance

Riding in place for over an hour or more can become incredibly monotonous; however, it obliges you to focus on the task at hand. In contrast to riding on the road, where you’re worrying about safety, taking in the scenery, or casually talking to your riding buddy throughout your workout. Spinning on a trainer compels you to think of your pedal stroke, breathing patterns, and pain. There are no distractions; hence you really need to rely on your sport psychology techniques to get you through your workouts. Additionally, you can listen to your breathing patterns and control them in order to reduce early fatigue. This can definitely come in handy during a race where extreme focus and endurance are required for an optimal performance.

Here a few ways to beat indoor trainer boredom with a few different games on the trainer.

Improved Bike Fitness

When riding on the road there are interruptions such as stop lights, making a U-turn, decelerating to avoid contact with the rear wheel of a fellow cyclist, or fighting a headwind just to name a few. Conversely, when riding on a trainer there are no gaps in your workout and you’re riding at a consistent effort throughout unless, you’re doing intervals.

If your workout contains intervals, then use a bike computer with a cadence monitor to alert you of your RPMs. By using this monitor you can do high cadence work intervals with low cadence rest intervals. Another benefit of a trainer is the ability to adjust the resistance felt while riding. After a few consecutive sessions on the trainer your legs will feel stronger when riding on the road, and you’ll notice an increase in speed.

Practicality

Probably the best aspect of using a trainer is how practical it is to use for one’s lifestyle. You can still fit in a great cycling workout despite snowy or rainy conditions. If environmental conditions are unsafe, then you can set up the trainer indoors at any time and cycle. Some people become creative with their workout space and place their trainers in the garage with no air conditioning and a big fan for added resistance to simulate road conditions. Additionally, if life commitments become more time consuming than usual you can still schedule a session in before dawn or late at night. It’s also an efficient tool to maintain the balance between family and training.

How to Choose and Prep for Your First Road Race

November 28, 2019 by Sarah Lauzé

Taking the first step towards your first road race is a huge deal. Not only are you taking your love of cycling one step beyond a hobby, but you’re also entering the world of elite teams, expensive gear, and race day nerves. But don’t let any of that intimidate you. There are a ton of races out there catering to every skill level and type of riding. Your first road race should be something you look forward to, a goal that pushes your training, but remains fun throughout the entire process. Here’s what you you need to know about choosing, then prepping for your first road race.

Step 1: Find the Right Race/Event

First things first, you’ll want to decide the type of race you’re going to do.

Road Races

Road races are what you probably think of when you picture a bike race: a mass start on public or private roads, everyone aiming for the fastest time possible. Depending on the race, riders may be sorted into categories ranging from five (new racers) to one (just below professional). They can also vary in distance from a few miles to over 200. If you are entering a category race, be sure to enter into a suitable category. If it’s your first race, that doesn’t necessarily mean you should enter the slowest category. Try going out on a few group rides and gauge where you’re at in comparison to riders who have raced before.

Sportive

Whereas road races are very competitive, sportive events give riders a chance to be timed in a race-like setting, but with much less intensity. They are typically a longer distance, and are all about making it across the finish line in the best time for you. You could include Gran Fondos and Century Rides in this category as a marathon for cyclists. The riders at the front compete for the win, the riders in the middle go for a personal record, and the riders in the back aim to beat the cut-off time.

Criteriums

A criterium race (or crits, for short) are short, fast races held on closed loop courses usually between 0.5 and 2 miles in length. Crits differ from standard road races in that there is no fixed race distance. Instead, you race for a predetermined length of time…in most cases. As they are often a shorter duration then regular road races, crits are pretty much all-out from start to finish.

Cyclocross

Cyclocross is a type of race that occurs in a circuit of about 2.5-3.5km and consists of off-camber tracks on grass and dirt, sand pits, tight corners, stairs, and barriers.  The races take place in city parks and organizers line up tape and obstacles to create the courses.

Gravel Grinders

A gravel grinder is a race or ride that typically combines riding on a variety of surfaces including asphalt, gravel, dirt, and even some single track. As this niche has become increasingly popular over the last couple years, there are a ton of events to choose from. Distances vary from 50–150+ miles, and the routes themselves from hard packed dirt roads to rocky and rough terrain.

Step 2: Get the Right Gear

Unfortunately with cycling, a lot of it does come down to having the proper tools for the job. Unless you’re willing to invest in new gear, be sure to sign up for a race that you can do on your current setup. In addition to a bike, you’ll need a helmet, cycling shoes, a jersey and cycling shorts with a good chamois.

Step 3: Start Training

Signing up for a race is a great way to get motivated to start riding more. The number one piece of training advice is to spend a whole lot of time on your bike. Although the top riders will likely be putting in upwards of 20 hours a week on their bike, the key is frequency. Get used to riding your bike almost every day, then start adding in some longer distances (start with one long ride a week). You can also start adding some tempo and interval work into your training to improve your ability to ride faster for longer.

Step 4: Keep it Fun

Once the race day finally arrives, no matter how prepared you are, nerves are a completely normal thing to experience. Check out this “Race Day List” for more on what to expect from the day of. Don’t forget, as nervous and anxious as you might feel before the race, you will also be a euphoric ball of joy after the finish line! Don’t worry too much about your results in your first few races, but focus more on the overall experience–including the training. So go ahead and sign up for that big event, trust that the nervous pit in your stomach is a good thing, and have a great time building lifelong memories on two wheels.

How to Train Smarter (Not Longer!)

November 27, 2019 by Sarah Lauzé

Achieving better fitness with a limited schedule can be difficult. To get stronger within your time constraints, you must be exacting in your methods of both training and recovery. This is the best way to make the most of your time and effort. Here are some tips to help you train smarter and get faster.

Ride Hard

There is no sense in riding easy if you have only a few days per week to ride to improve your fitness. Three very hard days on the bike should get you passable fitness to get you through your local group rides. More than three very hard days on the bike could burn you out if you do not get a week of recovery every four weeks or so. A very hard day means blindingly hard, so hard that you probably want to quit, have tunnel vision or maybe even release your bowels in your chamois. If you have never tested this dark, dark place, now is the time to try it.

Interval TrainingHow To Improve Your Fitness Without Training More

Set out with a plan of specific intervals for your extra hard days. This way you cannot cheat or have the power fall off by the end of the ride, or if you do cheat, you will know it was blatant. High intensity interval training has proven to be quite effective in increasing fitness with short workouts. Remember the last paragraph; you must be prepared to really slay it on the bike to make the most of these workouts. Start with small sessions once or twice a week and build up.

Sleep

Without sleep, all of your hard training, all of the hours you suffered on the bike are for nought. Sleep is when you make your real gains. It is when your body compensates for the training stress you put it through and adapts to the load. It is always incredibly important, but if you are burning the candle at both ends with work, family and other obligations on top of training, quality (and large quantities) of sleep will keep you afloat in all aspects of life and let you make fitness gains.

Nutrition

Again, with the focused approach that is necessary when you are short on hours, your nutrition needs to be completely dialed too. You will not be doing huge volume, so you do not need large quantities of food, but you need to make sure you are getting the highest quality food. Good nutrition will fuel your workouts to the best of your ability along with fueling proper recovery.

When you are pulled in many directions, it is easy to fall into a routine of quick and dirty food. If you want those fitness gains bad enough, you will need to figure out a way to get the best nutrition possible. It will make every pedal stroke that much better and mean that much more in the long run.

Drink lots of water (with electrolytes, not purified water, whether it is distilled or reverse osmosis) to keep your blood viscous and flowing. It will deliver nutrients to your muscles more freely and keep your heart’s work to a minimum.

Cross TrainingHow To Improve Your Fitness Without Training More

With limited time, sometimes a full training ride is difficult to squeeze in. On those days, cross training may be a quick way to maintain fitness that you are trying to hold onto or increase. If you can keep it cycling specific, whether it is in the weight room, skating or nordic skiing, that is great. If you have other activities that fit into your schedule, like running, that is fine too, although it will not have as much of a positive impact on your cycling musculature.

Recover Hard

Recovery should be happening whenever you are not training, although that is probably a stretch when you have a busy life. When you are recovering, do it full on. Get your feet up, keep hydrated, eat well and keep the external stress down. An additional recovery tactic is compression gear. You can wear it when you are at work under your normal work clothes.

If your time is limited and you want to make fitness gains, everything you do has to be full-on: your riding, your sleep, your nutrition and your recovery. Make it a routine that works and you will make the most of your time.

Next Page »
  • Facebook
  • Google+
  • Tumblr
  • Twitter

Latest Articles

Who Invented the Bicycle?

October 6, 2020 By Sarah Lauzé

What size bike do I need?

October 4, 2020 By Sarah Lauzé

The Number of Calories Burned Cycling

October 1, 2020 By Sarah Lauzé

The Benefits of Cycling for Your Mental Health

September 9, 2020 By Sarah Lauzé

Symptoms of Bad Bike Fit

September 8, 2020 By Sarah Lauzé

How to Choose the Best Cycling Jersey

September 2, 2020 By Sarah Lauzé

Useful Info

  • Contact
  • Finally, A Global Cycling Club That Is Focused On Community And Love Of Cycling!
  • Share Your Story!
  • Terms And Conditions Of Use
  • Welcome to I Love Bicycling
  • What Happened When I Stretched Every Day For a Month

Recent Posts

  • Who Invented the Bicycle?
  • What size bike do I need?
  • The Number of Calories Burned Cycling
  • The Benefits of Cycling for Your Mental Health
  • Symptoms of Bad Bike Fit

Search I Love Bicycling

Connect with Us

  • Facebook
  • Google+
  • RSS
  • Tumblr
  • Twitter

Copyright © 2021 · Magazine Pro Theme on Genesis Framework · WordPress · Log in