• Training
    • Injury Prevention
    • Training Tips
  • How To
    • Bike Fit
    • Gear
  • Nutrition
    • Nutrition Tips
    • Weight Loss
  • Repair
  • Reviews
  • Stories
    • Funny Stories
    • Jokes
    • Quotes
    • Videos
    • Funny Videos

I Love Bicycling

I Love Bicycling is a website that is geared towards cycling for beginners with road cycling tips, training articles, nutrition tips, weight loss, how to’s and bike repair articles.

Search Results for: pump

How To Use A Bike Pump

March 17, 2018 by Adam Farabaugh

New gadgets and toys often come with manuals but who actually opens them up let alone reads them? A bike pump seems simple enough to operate but not knowing how to use a bike pump is something that may have you flustered.

how to use a bike pump

Knowing How To Use A Bike Pump

Typically you find out that you don’t know how to do something when you precisely need to do that something. Knowing how to use a bike pump before you actually need to use it can be a headache saver but some of you likely found your way here to this article because you need to do that something right now; pump up your tires.

The Types of Bike Pumps

First, you need to know what kind of bike pump you have. Trying to pump up your tires with your feet holding the bottom of one pump won’t work too well with another. You will also need to know what type of pump head you have and how it works.

Floor Pump

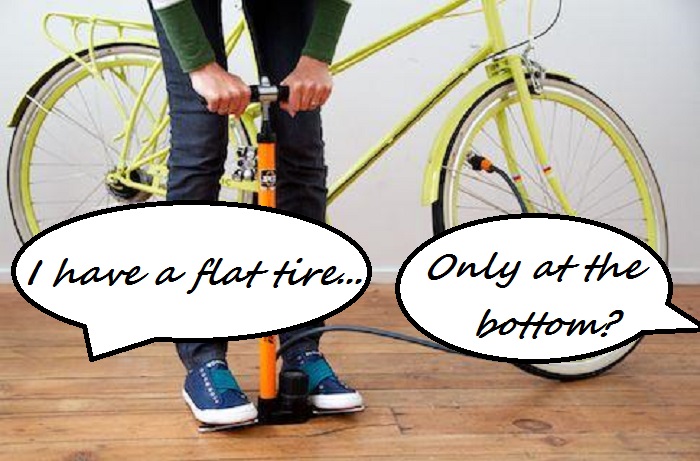
A floor pump, as pictured above, is a pump you will likely leave at home or maybe in the back of your car. This is a tall pump that is held in place by placing you feet on the bottom of the stand.

Frame Pump

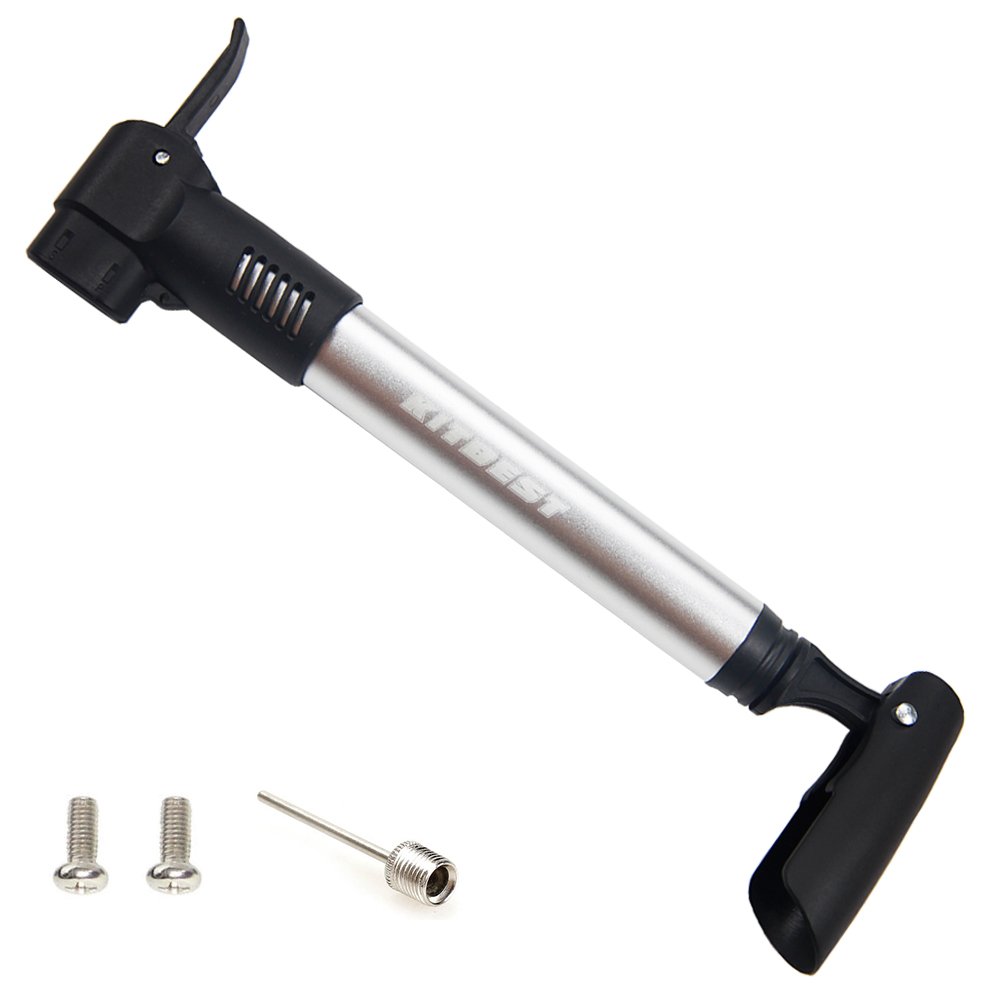
A frame pump is a long, slender pump that fits along the top tube on your bike to pump up your flat tire while out on a ride. It’s advantages over the below pumps are that it requires a lot less strokes and can reach a higher pressure; important if you’re on a road bike.

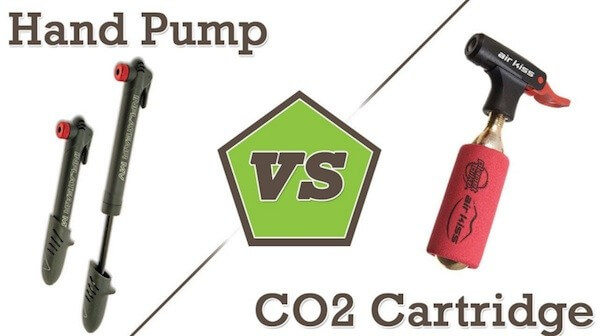
Hand Pump

A regular hand pump is small enough to fit in a jersey pocket or perhaps yours came with a mount that attaches next to your bottle cage. These ones are handy while out on the road but less than ideal if you’re using it to pump your tires up at home every few days.

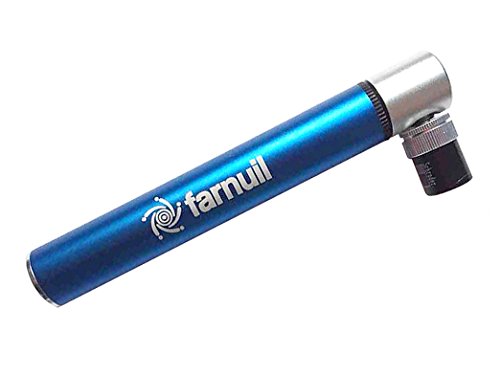
Ultra Mini-Pump

Bike Mini Pump. Capability Pocket-Sized with Optimized Air Flow 100 PSI, Mounting Bracket, Presta-Schrader Valves, CNC Aluminum, Lightweight 72 Grams.

Having a pump that is small enough to easily fit in a jersey pocket amongst other stuff along with in a saddle bag or side pouch of a Camel-bak can be super convenient. It will get you out of a bind but be ready to do a lot of pumping.

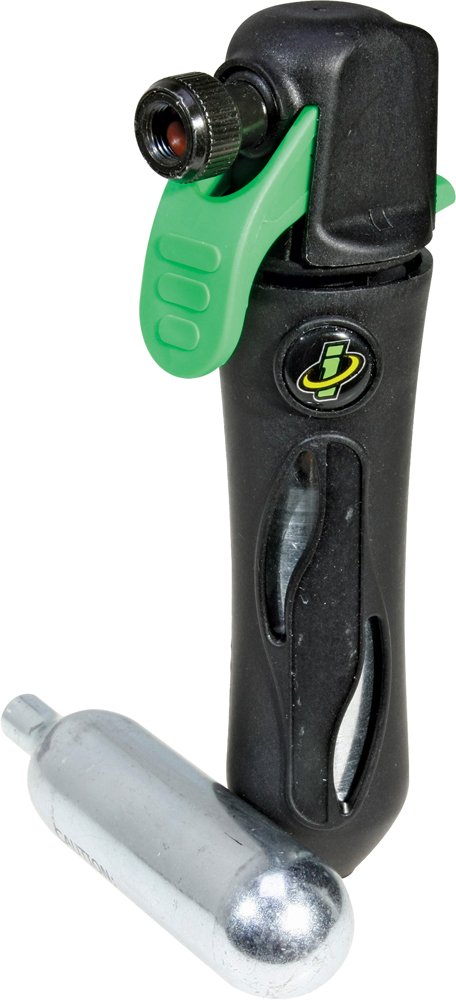
CO2 Cartridge

A CO2 cartridge is super fast and efficient, unless you need to pump up more tires than you have CO2 cartridges; then you’re quick flat change is a long walk or wait for a ride.

The Differences in Pump Heads

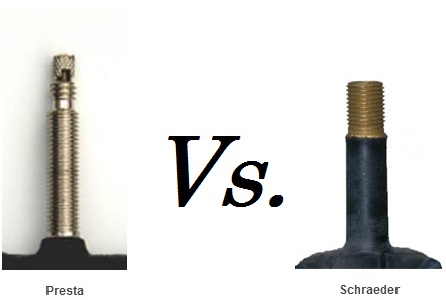
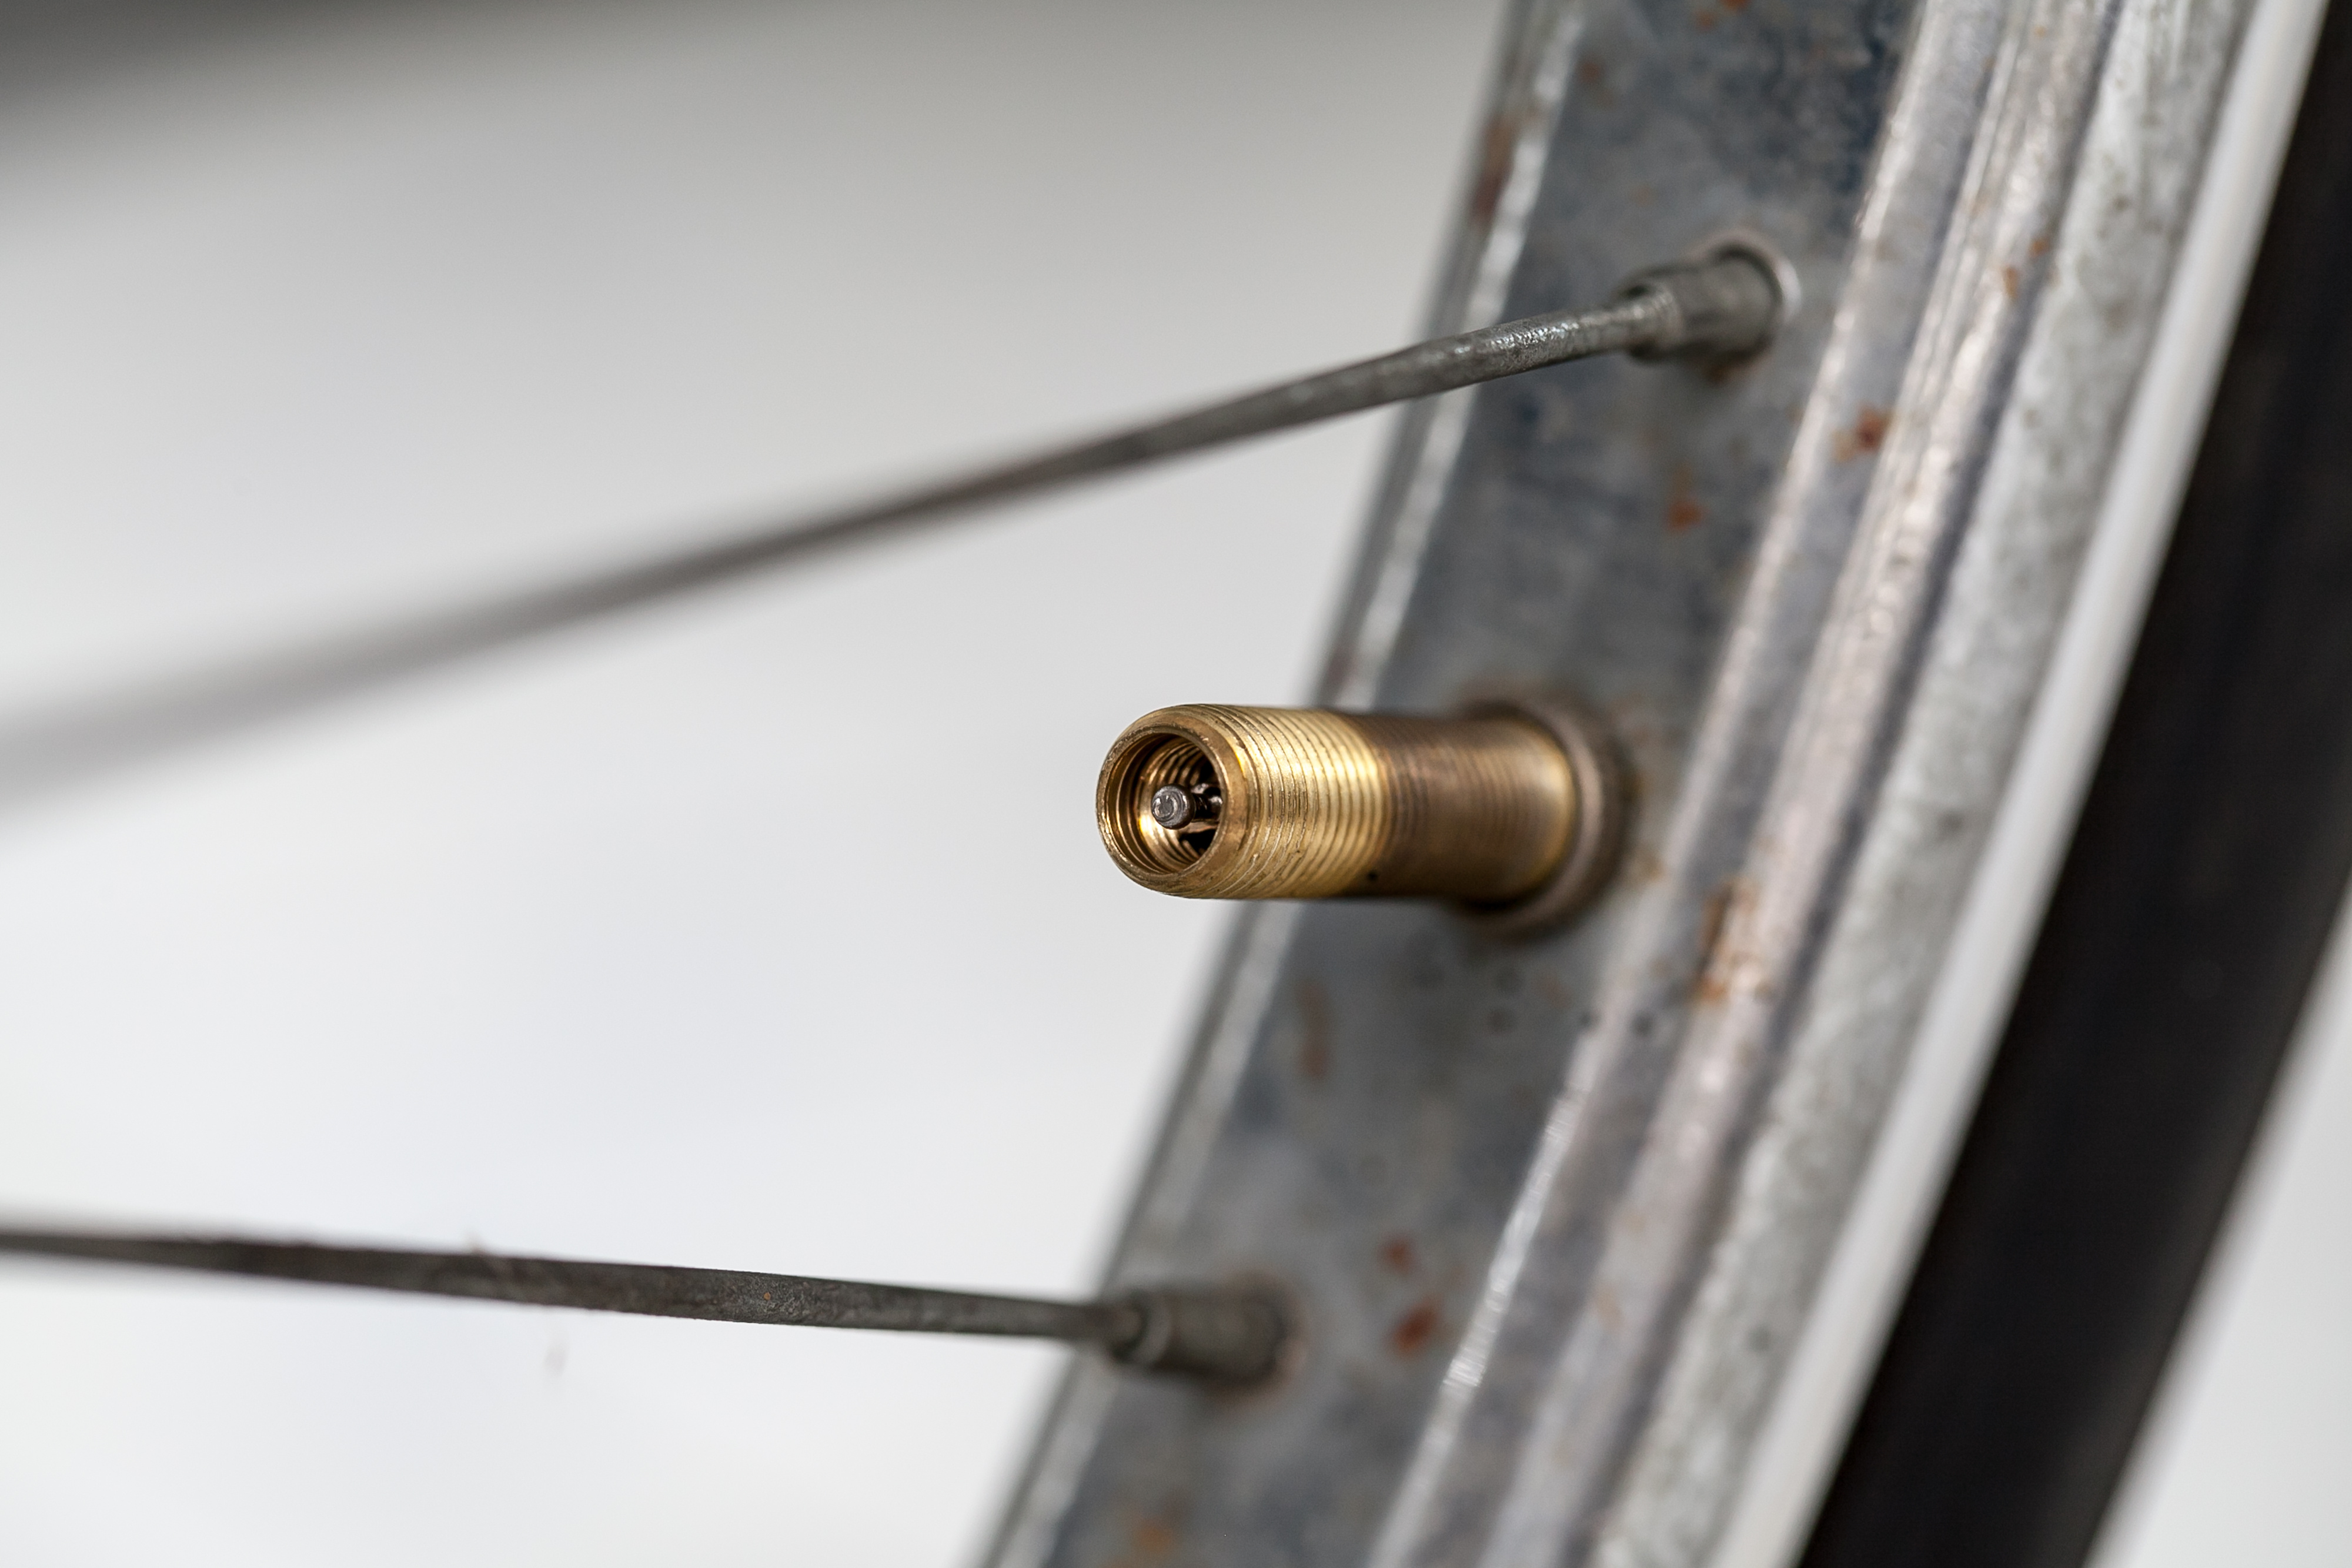
Now that you know what kind of pump you have, you have to know how to attach it to the valve stem. But before you do that you need to know what kind of valve stem you have to make sure it is open as well as to make sure you are using the right style pump head. The two types of valves are Presta and Schraeder. Below, Presta is to the left. With this type you need to unscrew the top-most piece counter-clockwise to open the valve before pumping. To close, simply turn clock-wise. Schraeder valves, to the right, are ready to pump and don’t need opening nor closing. Just make sure you take off the plastic cap first.

Presta-vs-Schrader

Now that you know what valve type you’re working with, you need to know which head you have and how to use it. The first type, which you will find on all of the pump types, is the standard single nozzle head. These typically work with both Presta and Schrader valves by unscrewing the outer plate (in the image below, the silver piece) all the way off. This will expose a rubber nozzle. For Schrader, you will want the wider side pointed outwards. For Presta, you will want the narrower side pointed outwards. Behind this nozzle you will then probably find a plastic piece. For Schrader, place the pointy-tip side towards the outside. This is what de-presses the valve pin on the inside of the Schrader valve. For Presta, place the point-tip away from the nozzle. Once you have these pieces orientated for your valve type, simply screw the cover plate back on.
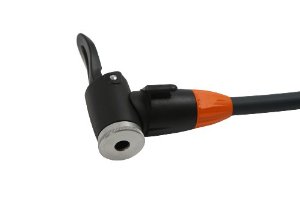
pump head
Single Nozzle

For a dual nozzle, pictured below, simply place the valve into the correlating hole. Large size for Schraeder, small size for Presta.
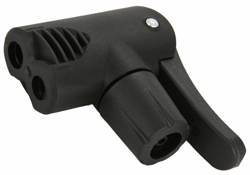
pump head 1
Dual Nozzle

Now that you have the valve in the correct size nozzle, you need to lift the lever on the rear of the valve head. This tightens down the rubber nozzle to ensure no air loss. (Note: On some fancier models this is reversed. Before placing the head on the valve you can lift the lever and see if the nozzle tightens down or not.)

How To Pump You Bike Pump

Now that you have the pump head securely attached, you are ready to pump. With all of the pump types, they will likely seal well when new but when they age you may need to hold the valve head tight to the valve with one hand while pumping with the other. With a floor pump, simply place a foot or two on the base and pump away. With the other pumps you will want to hold the other end of the pump with your other hand so all of the force isn’t placed on the valve stem. If you don’t do this you will likely brake the valve stem off leaving you with a less than ideal situation. A good way is to hold the valve head while also holding the rim to support your hand.

CO2 Option

With a CO2 cartridge, the attachment mechanism might be the same or perhaps a little different so you will need to do the same things mentioned above to make sure you’re using the right valve nozzle and then to make sure it’s securely attached. Then instead of pumping, you tighten down the cartridge to pierce it and either the tube will start filling up automatically or there will be a button to press to begin inflation. Either way, make sure you don’t over inflate the tire and when you take the valve head off a Presta valve, make sure it doesn’t freeze open. Simply give the valve a tap down and turn to close quickly.

What Pressure Should I Pump To?

Now that you know how to use a bike pump, what pressure should you pump to? With a floor pump you will be able to get your tires easily to whichever pressure you like. With the other pumps, it will likely be hard to get the pressure up to what you were riding originally. On road tires, get as much air in as you can to avoid pinch flatting. You won’t have a gauge so you will have to go by feeling the hardness of the tire with your thumb. For road tires, you should only be able to press in a tiny bit. For cyclocross and hybrid bikes, you should be able to press in a bit more, perhaps two to three millimeters. For mountain bike tires, you should be able to press in even more, five millimeters to one centimeter.
Co2 Versus Frame Pump

November 4, 2015 by Wade Shaddy

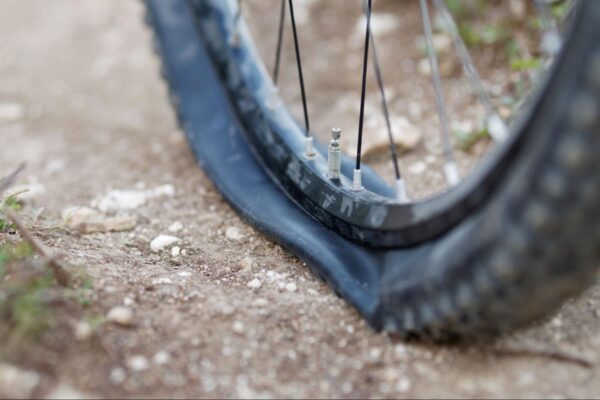
Co2 Versus Frame PumpFlat tires happen to all cyclists, it’s unavoidable. Dealing with flat tires is a part of cycling, and you should have the gear and know-how to get it fixed fast. Fixing a flat typically centers around air delivery. The system you choose can leave you stranded, or get you back on the road where you belong.
The Debate

The debate over compressed air and manual frame pumps has been around forever. Both have advantages and disadvantages. Choose the weapon of choice:

Co2 Pump Anatomy

The basic Co2 pump consists of a small nozzle. The nozzle fits on a disposable cylinder. When you need to air up a tire, attach the nozzle to the valve on the tube, and screw the cylinder on. You should feel a chunk, or a light whisper when the nozzle punctures the seal on the cylinder. When you make the connection, hit the trigger. It sounds simple, but there are variables that make it more complicated than it sounds.

The Nozzle

There are two types of nozzles; those that discharge air all at once, and those that control the flow of air. Controlled nozzles are the best choice. Open-discharge nozzles can’t be used to partially inflate the tube to get it back in the tire, and you have to use your cheeks to blow air into the tube before stuffing it back in the tire.

The Cartridge

Cartridges come in two varieties; threaded and non-threaded. The threaded cartridge is the better choice, it’s less likely to come off at the wrong time. Both varieties of cartridge come in different sizes, 12, 16 or 25-gram. The smaller ones are designed to inflate tires up to about 90 PSI.  The larger ones are designed for filling tires up to about 120 PSI. Smaller cylinders are affordable at about 50 cents each. Larger cylinders can run several dollars each.

Frame Pump Anatomy

Frame pumps come in a plethora of sizes from mini to large. Some of them have two heads on the same nozzle, one for Schrader valves, and one for Presta valves. Most road bikes use Presta. Mini-pumps require more effort to pump up a tire, but they fit almost anywhere on the frame with small clamps. Larger frame pumps typically fit on the seat tube, or down tube of the bike. Some frame pumps have a short hose to make inflation easier, but the small hoses can leak if bent.

Speed Matters

If speed matters to you, the Co2 system can inflate a tire in 2 seconds. Frame pumps, depending on model, require somewhere between 3 and about 8 minutes to fill a tire. This is probably the single biggest advantage that Co2 has over the frame pump.

Clean Lines

If you’re concerned with your bikes finish, or the fact that a frame pump makes you look like a sissy, the Co2 system has the edge over the frame pump. Co2 nozzles and cylinders fit neatly in your underseat pack, leaving the clean, crisp geometry of your bike intact. However, they take up room in your pack that you need for tools and other gear, and rattle around unless secured.

Experience Required

Compressed air systems require some experience to use properly. If you get the cylinder crooked, cross-threaded or otherwise installed on the nozzle the wrong way, the cylinder can discharge it’s precious content into the air. There have also been incidences where the cylinder explodes the nozzle into pieces when installed improperly, always wear your glasses when using Co2 systems. If the tire is not properly installed on the rim, the instant pressure of the Co2, can cause the tube to expand out the side of the bead, and it explodes. If any of these thing happen, you’re walking home unless you have a frame pump or extra CO2 cartridges and tubes.

Dependability Issues

Frame pumps rarely fail, and are more reliable that Co2 systems, simply because you never run out of air. If you have multiple flats, and use up all your cylinders, your ride is over. Frame pumps offer the peace of mind that Co2 systems can’t match.

Tubeless Tires

Tubeless tires, aren’t typically mainstream, but if you do run them, frame pumps won’t work on them. Tubeless tires require the sudden blast of pressure that only a Co2 system can deliver, to seat the bead or the tire on the rim.

Environment and Travel

Co2 cyclinders should be discarded in a landfill. Leaving them beside the road is unacceptable. This means you have to pack the empties with you back home. Another fact: you can’t take cylinders with you on an airplane, it’s against the law. If you travel to a remote location with your bike, you might not be able to find any spare cylinders.

Air Versus Carbon Dioxide

Bike shops won’t likely tell you, but Co2 — carbon dioxide — won’t stay in your tires like good old-fashioned air from a frame pump. It’s scientific, but generally speaking, Co2 molecules tend to leak out, little by little. Expect your Co2 inflated tires to require more air the next day, just to keep them at their recommended pressure. It’s advisable to let all of the Co2 out, and replace it with real air when you get home after fixing a flat.

Racing Advantage

The differences between Co2 and frame pump systems boils down to speed, especially if you plan on racing bikes. Learn how to use a Co2 system, you won’t see to many racers without them.

Group Riding

No-drop group riding is another place where Co2 can get you back in the pack faster, and your companion riders won’t have to wait for you. Even if it’s one of your friends that flat, you can still use your Co2 system to get their tire fixed fast, and you’ll be a hero, always ready to help out.

The Benefits of Cycling for Your Mental Health

September 9, 2020 by Sarah Lauzé

The benefits of cycling may be too numerous to list, but there are probably some aspects they you may not have thought about before. We all know that riding a bike is great for your physical health, but what about your mental health?

There has always been a link between exercise and improved mood, as studies through the years have revealed, but it goes beyond just a good mood. As more and more research is being done, there is a clear link between exercise (specifically outdoor exercise) and combatting depression, anxiety, and stress.

Although many people may, at first, hop on a bike to lose weight or embrace an active lifestyle, a very valuable side effect is a happier, more stable life. Mental health may be an even stronger predictor of life expectancy than physical health, so it is one of the most valuable benefits of cycling.

benefits of cycling

Top 10 Benefits of Cycling for Your Mental Health

1. Promotes an Overall Healthy Lifestyle

Exercise should be something you look forward to in your day, not something you’re just checking off the to-do list. It should be so a part of your lifestyle that it becomes less about burning calories and more about how it makes you feel. Cycling is one of the greatest forms of exercise within everyday life. Not every ride has to be a huge ordeal, but even a half hour ride or a commute to and from work can have huge benefits both physically and mentally. It doesn’t have to be competitive or even goal focused, but can be a way to get outside and leave all that stress at the office.

2. Natural High (Endorphins!)

People often overlook this fact, but have you ever wondered why individuals that are physically active always seem so much happier than those that aren’t? It’s not just a coincidence, and it actually has a lot to do with the chemicals inside of your brain. When we cycle, our heart pumps blood to every single blood vessel and cell at a greater rate. With blood comes oxygen, and oxygen plays host to endorphins!

Endorphins are a microscopic chemical that help us to feel good. The more endorphins we have, the happier we feel. Just a few hours of cycling a week can trigger a consistent flow of these chemicals, and they aren’t just great for your emotions – they have also been linked to fighting illnesses like Alzheimer’s!

3. It’s a Healthy Addiction

We all have our vices, the things that we turn to in times of stress or emotional trauma. Cycling can replace the more harmful addictions such as cigarettes, alcohol, or overeating and serve as that go-to thing that you know will make you feel better. Sometimes it’s tough to find the motivation (yes, sitting on the couch eating chips may be easier), but you’ll never regret getting out there. Make cycling your first plan of attack, and you may just find yourself not being able to stop.

4. Creative Breakthrough

Many creatives such as writers, musicians, and artists use exercise as a means of getting past mental blocks. I know I’ve had some of my best ideas come to me while out on a bike! The uniform movement of cycling has a relaxing effect on the brain, stabilizing both physical and mental function. A recent study showed that after just 30 minutes of cycling, participants scored higher on tests of memory, reasoning, and planning. So, instead of banging your head on your desk or scrolling through Facebook, try heading out for a ride.

5. Better Sleep

Exercise has been shown to help regulate your sleep patterns. One reason may be the body-heating effects of exercise and cycling in particular. The increased temperature followed by the post-ride drop promotes falling asleep through decreasing arousal, anxiety, and stress.

6. Fights Anxiety and Depression

Cycling can, for some people, be as effective as medication–without the side effects. This isn’t true for everyone, of course, but trying exercise as means of fighting depression can be a great first step. Cycling promotes all kinds of changes in the brain, including new thought patterns that promote feelings of calm and well-being. Plus, you have those endorphins kicking around, which can act as powerful chemicals within the brain.

Cycling also relieves tension and stress, boosts mental and physical energy, and can help fight anxiety. It can be a great way to “zone out,” but you can also use it as a time to focus in and even meditate. Pay attention to each rotation of your legs, the rhythm of your breathing, the wind on your face. It may sound cliche, but this will leave no room for the otherwise constant flow of worries running through your mind.

7. Increases your Self-Esteem

There’s no better feeling than tackling a tough climb and knowing it’s nothing but your own physical and mental strength getting you to the top. You will feel strong and powerful, and that begins to make it’s way into the other parts of your life. You will feel better about your appearance, and will have a sense of achievement as you meet and surpass goals you set for yourself.

8. Stress Buster

With so many jobs now tied to computers and chairs, stress has a way of tensing our bodies, making them exhausted and sore by the end of the day. You may find you suffer from back and neck pain, or constant headaches from stress. This can become a cycle that feeds itself, with stress going in and exhaustion coming out. Cycling can be a great way to break the cycle and relieve tension in the body. In turn, as your body relaxes, so will your mind as that stress begins to lift from your shoulders.

9. Increased Focus

Cycling and physical activity immediately boost the brain’s dopamine, norepinephrine, and serotonin levels—all of which affect focus and attention.

10. More Energy

It may seem counterintuitive, but exercise is one of the best ways to gain more energy. Yes, you are using physical energy on your ride, but spending time with that elevated heart rate will give you a boost of energy.

A Beginner’s Guide to the Cycling Essentials

August 1, 2020 by Sarah Lauzé

If you walk into a bike shop with zero context or little to no experience in the cycling world, the sheer amount of stuff can be overwhelming. If you’re not careful, you can end up buying a lot of things you don’t necessarily need, and missing out on some of the things you really need. Here are some of the cycling essentials (and near essentials) that will get you started in the world of cycling.

Cycling Essentials

The Cycling Essentials

A Bike

Okay okay, this one is a little obvious, but it can be confusing to know what to look for in a road bike when you’re first starting out. Do you get the bare minimum and upgrade later? Or do you invest a little more now? Check out this great article on “How to Buy a Bike” for some guidelines.

HelmetCycling Essentials

Riding without a helmet is NEVER cool. So, if you own a bike, you should also own a helmet. It doesn’t matter if you’re riding on busy roads, technical trails, or bike paths. If you go down and hit your head, a helmet can prevent disastrous consequences. There are a ton of cool looking options out there, so make sure you get one that fits you properly.

Glasses

You may have a pair on sunglasses you’ll wear on those bright, summer days, but wearing glasses while on your bike can do more than shield from the sun. Glasses help break the wind when you’re riding, preventing eye irritation. They also work wonders to keep bugs, rain, and other debris from smacking you in the eyeball (which is not a pleasant experience). Many cycling glasses will come with interchangeable lenses, so you can wear the same pair no matter what the weather.

A Bike Lock

If you’re ever going to leave your bike outside anywhere, then you’re going to want to lock it up. Bike locks may seem pricey, and it’s tempting to go for the cheapest option, but ensuring it’s difficult (if not impossible) for someone to steal will save you money in the long run.

A Bike Cover

If you don’t have room to keep your bike inside, you will want to get some sort of bike cover to keep it protected from the weather. If you leave it open to the elements, over the course of just a few weeks you will begin to see visible damage. The colour will fade, chain will rust, and your bolts will corrode and seize up. So, invest in a cover that fits well over your bike, keeping it dry while also allowing moisture to escape.

Cycling EssentialsCycling Jacket

A cycling jacket is an indispensable garment that will keep you comfortable and on your bike even when the weather goes bad. Most are lightweight and waterproof, so they will not only block the wind and cold, but rain as well. Most are small enough to roll up and stuff into a jersey pocket so you are always prepared in case of an emergency.

Pump, spares, a multi-tool

You won’t want to have to end your ride and take your bike into the shop every time you get a flat. You’ll need both the tools and the know-how to take care of some of the most common bike fixes. A good tire pump, multi tool and spare tubes (if you have clincher tires) will go a long way to keep you out on the road. For some basic maintenance and repair, check out “101 Best Bike Repair and Maintenance Tips.”

The Cycling Near-Essentials

Cycling Shorts

Possibly the most critical item of technical-gear you can purchase for cycling is a good pair of cycling shorts. A solid pair with a good chamois will allow you to feel more comfortable, powerful, and in control while on the bike. It will also allow you to ride for longer periods of time without discomfort.

Cycling CapCycling Essentials

A cycling cap is for both function and style. It keeps the sun out of your eyes as well as sweat and rain, and winter caps can keep you warm on a chilly day. Also, if you use your bike for commuting around town and are worried about having hemet-hair, a cycling cap can be a great lightweight fix.

Clipless Pedals and Cycling Shoes

Clipless pedals with cycling shoes is the most efficient and comfortable system out there when it comes to road biking. The stiff sole of the cycling shoe provides a rigid platform to transfer power from your legs to the drivetrain and propel the bike forward. Even if you’re just starting out, cycling in your regular running shoes can begin to hurt your feet, so getting used to the clipless system from the start may be the best idea.

Bike Computer

It can be fun and inspiring to track your progress over time, and the best way to do that is with a bike computer. It can track your ride metrics; from time and distance on the most simple computer, to location, power, and far more on the most powerful ones.

10 Mistakes to Avoid When Fixing a Bike

July 23, 2020 by Wade Shaddy

We all make mistakes, but when it comes to our bikes they can be costly. Here are some of the most common mistakes to avoid while fixing your bike.

1: Tube and Tire Mistakes

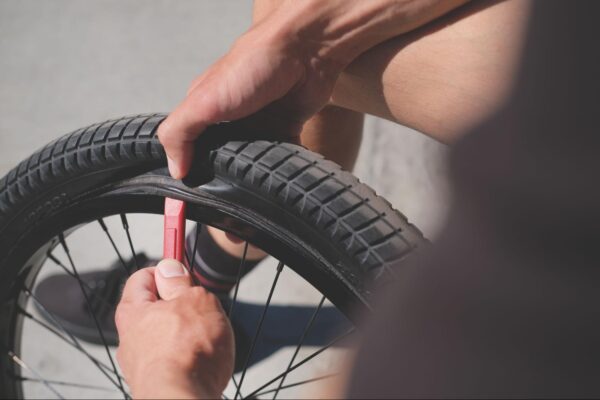
One common issue always comes up when fixing a bike becomes necessary. It happens when you fail to seat the bead, and attempt to air up the tire. The tube bulges out between the tire and rim and then BANG! There goes a new tube. Always check around the perimeter of the tire to make sure it’s inside the rim. You will also want to make sure that you can’t see the inner tube when you push the tire inward so you can see the inside of the rim. A tube between the tire and rim will flat instantly as well. Keep checking all the way around also as you add pressure so it doesn’t slip out.

Many a new tube has been pinch-punctured by using tire levers to g

et the tire back on, leading to any amount of frustration, bad words, and a tire that won’t hold air. It happens when you mistakenly get the under-inflated tube between the rim and tire lever. When you use the lever to pry, it pinches a hole, and you never know it till you try to inflate the tube. It’s best to skip the levers and use your thumbs and finger to apply brute force to get the tire back on the rim. Sometimes though the tire is simply too tight and you need to use levers; just be careful.

2: Bad PSI

Failure to air up the tire to it’s proper PSI (Pounds per Square Inch) promotes premature tire wear, poor handling and performance. Too much air is dangerous. Always check the side of the tire for the printed info and get the PSI right. If you’re heavier, error with a few more pounds, if you’re lighter, you can take a few out to soften your ride.

3: Not Understanding Tools When Fixing A Bike

A multi-tool might sound like it can repair anything that can go wrong when fixing a bike, and most of them do. But if it doesn’t have the right bits or tips to adjust your saddle height, shift your slipped handlebar, adjust your headset, or fix a broken chain, then it’s a waste of space and added weight. Get to know what your multi-tool is capable of. The chain breaker is probably one of the tools that you should practice with ahead of time. They can be difficult to use if you don’t know what you’re doing especially on the side of the road.

4: Failing to Change a Cable

A fraying cable is ugly. There’s nothing worse than to look down and  see a frayed cable hanging from the derailleur or emerging from your shifter or brake lever. Once cables start to fray there’s no going back, replace it as soon as possible. Don’t make the mistake of trying to run it any longer than you need to.

Make sure that the cable end caps — they look like silver bullets — are installed at the ends of cables. You can pick them up for pennies at any bike shop. There’s no excuse for running cables without them. When pinching the caps on the end of the cables, make sure you don’t pinch them too hard causing them to split or cut.

5: Messing with Your High and Low Limit Screws

The limit screws in your derailleurs rarely, if ever get loose. They are there to set the limits of your derailleur’s movement up and down. If your bike shifts clean and crisp when you first bought it, chances are you’ll never need to touch the limit screws ever again. Don’t make the mistake of messing with it unless you know what you’re doing. Once you get it out of whack, it can be a pain to get it back where it belongs.

If your shifting has suddenly gone awry, it’s typically NOT because the limit screws are off. It’s because of a dirty cable, cable housing or cable tension or a bent derailleur hanger. Never use a screwdriver on limit screws before trying everything else. Normally it’s just a simple adjustment of the barrel adjuster.

6: Bad Lubing Techniques

This one is one of the most common first time cycling maintenance mistakes; using the wrong lube on your chain (lube that’s not bicycle-specific) and lubing without cleaning first. Adding lube to a dirty chain is a recipe for chain wear and eventual failure. It’s smart to wipe down your chain with a clean rag after every ride. You probably won’t do this, but it’s still a good idea. Then apply the correct lube and give it a light wipe down after to wipe off any excess.

7: Tightening the Quick Release Wrong

The cam (up and down) action of a quick-release is the only way to secure your wheel to the hub. It prevents the wheel from getting wrenched out of the fork when put under sudden, extreme loads. Adjust the skewer nut to allow the lever and cam to swing past top dead center and firmly into the closed position with adequate pressure. The lever is tight when it leaves a small indention in the skin on your palm. Don’t rotate the nut or lever to tighten after it’s closed.

8: Over-Tightening Headset Cap

Modern headset systems are threadless. They work by pre-loading the bearings with the cap on top ( the vertical bolt on top of your steerer-tube is not used to hold the stem in place). The torque to secure the stem is added with pinch bolts perpendicular to the stem.

If you can hear a clunking coming from your front end or if your handlebars feel unstable — then it’s fine to add some pressure to the stem by tightening the cap on top a bit at a time with the bolts on the side loose until the clunking stops. Then tighten down the pinch bolts on the side of the stem.  You only need this top bolt tight enough to remove bearing play. If it causes resistance in your steering — it’s too tight. A full run-down is explained here.

9: Failure to do Maintenance on Your Seatpost

Don’t leave your seatpost in the bike for extended periods of time. Three months is doable. Six months is way too long.  Seatposts tend to seize up and it makes it impossible to change saddle height. Forcing it up or down results in breaking it. Even if it’s been greased, the grease breaks down and eventually allows oxidation to occur, and moisture seeps into the frame. Not only do metal seatposts seize, carbon posts seize as well. Apply a generous dollop of grease to metal after cleaning. Use carbon specific grease or lube for carbon.

10: Not Closing the Quick Release on Your Brakes

The most common mistake when fixing a bike is saved for last; failure to close the quick release on the brake after changing or removing a tire. All cyclists are guilty of it. The brake quick release allows you to easily remove or install a wheel as the brake opens up further to allow the pumped up tire to easily fit through the brake. If you forget to close the quick release after, you are going to have to pull your brake lever a lot farther for the pads to touch the rim. If they’re too far, they may not have the ability to stop you because your brake levers will bottom out against your handlebars.

The Many Benefits of Cycling

July 6, 2020 by Sarah Lauzé

If there’s a single form of exercise that medical experts promote above all others – it’s cardio. Your cardiovascular health is incredibly important, and as a cyclist you’re already benefitting. But just how beneficial is cycling for your health? Does it simply improve your internal well-being, or can it have an effect on your external and emotional health too? The answer is actually pretty incredible. In fact after years of research, doctors state that cycling is one of the most advantageous exercises around. Here are the many benefits of cycling for you mind, body, and overall health.

Your Mind

People often overlook this fact, but have you ever wondered why individuals that are physically active always seem so much happier than those that aren’t? It’s not just a coincidence, and it actually has a lot to do with the chemicals inside of your brain. When we cycle, our heart pumps blood to every single blood vessel and cell at a greater rate. With blood comes oxygen, and oxygen plays host to some of the most positive endorphins imaginable!

Endorphins are a microscopic chemical that help us to feel good. The more endorphins we have, the happier we feel. Just a few hours of cycling a week can trigger a consistent flow of these chemicals, and they aren’t just great for your emotions – they have also been linked to fighting illnesses like Alzheimer’s! The next time you take to your bike, try to remind yourself that you’re doing much more for your brain than simply enjoying the ride!

Your Body

Keeping your organs fit and healthy is very important. When you’re cycling, your heart and lungs are in consistent use and, just like any other muscle, the more that you use them, the stronger they’ll grow. Studies have shown that just 15 minutes of exercise a day can encourage the development of healthier organs, and cycling just so happens to be one of the best forms of exercise!

As briefly mentioned above, cycling is a form of cardiovascular exercise (as is anything that gets your heart pumping at an improved rate consistently). The more that you cycle, the more that your heart and lungs will be in use. As your heart pumps blood around your body, your lungs provide a fresh supply of oxygen, and this is what’s so beneficial to your organs.

Your Strength

Unlike direct muscle-building exercises, cycling is a little more focused on endurance, but with endurance comes strength. The main muscles used while cycling are your quads, hamstrings, calves and even glutes and hip flexors. As you pedal, your leg muscles are being used consistently, and the higher the gear; the more strain will be placed on your muscles.

The more that you cycle, the more often your muscles will be put to work, and the stronger they’ll grow. If you eat the proper amounts of protein, fat and carbs, you’ll soon find that your muscles begin to increase in size, as well as strength.

Your Health

As enjoyable as cycling is, it’s actually a powerhouse of health and fitness too, and the more that you do it, the healthier you’ll feel. The great thing about cycling is that there really isn’t a limit on how much it can improve your health. Even the unhealthiest individual can climb on a bike, spend 15 to 30 minutes cycling, and start to feel a change. So imagine how healthy active cyclists could be if they consistently went for a ride a few times a week?

A healthy mind can go a long way, and a healthy body will go even further. The harder you push your limits, the quicker your body will adapt to the pressure, and you’ll soon be tackling rides that you struggled with at first. If you’re already at a point where you feel like a pretty competent cyclist, then there’s no harm in pushing your limits to improve your performance.

From Pavement to Trails: Mountain Biking for Beginners

May 14, 2020 by Sarah Lauzé

Mountain biking is one of the greatest ways to get some exercise, spend time outside, and hang out with friends. For road bikers, it can be a great way to switch things up, get out on some new terrain, or stay in shape while the weather may not accommodate hitting the pavement. However, there are some major differences between the two, so here is a guide to mountain biking for beginners.

If you have only ridden a road bike, there will be some key differences you’ll notice right off the bat. Mountain bikes have much wider tires with rugged tread for optimal traction and durability on off road terrain. With road biking you want to minimize the contact point between the bike and the road, but on trails you want as much traction as possible. There will also be some sort of suspension system to make riding over rough terrain bearable.

The Bike

First things first, you need a mountain bike. Before deciding what kind you want, you need to think about what type of riding you’re going to be doing. Generally speaking, this will break down into two main features: suspension type and wheel diameter.  There are three main types of mountain bikes when it comes to suspension: rigid, hardtail, and full suspension. Wheel diameter is a choice between 26, 27.5, and 29ers.

Rigid mountain bikes are a bit more rare, but some people do choose to use them. With no suspension, they are less expensive and easy to maintain, but can make for a pretty rough ride when tackling technical trails.

Mountain Biking for Beginners

Hardtail mountain bikes have a suspension fork in the front, but not the rear of the bike. They are typically less expensive because there are less moving parts, and can have the option to lock out the front suspension for more efficient climbing. Many cross country riders will choose a hardtail as they allow for more direct power transfer between the pedal stroke and the rear tire.

Mountain Biking for Beginners

Full suspension bikes are a bit more complicated, so there are more variations when it comes down to the specifics. Generally, there is front fork suspension as well as a rear shock to absorb as much of the trail as possible. If you’ve been riding a hardtail and get on a full suspension for the first time, it will almost feel like you’re floating. It makes for a much more forgiving and smooth ride. Most downhill bikes will be full suspension, but more and more cross country bikes also feature full suspension.

Mountain Biking for Beginners

The Gear

A Helmet

Mountain biking is a ton of fun, but it can also be really dangerous. So, you should always wear a helmet anytime you hop on your mountain bike. It should fit your head snugly, and be level on your head so it doesn’t obscure your vision.

Gloves

Gloves are not a necessity, but they are definitely nice to have when you’re starting out. Not only will they protect your hands if you crash, but they can reduce soreness that comes from the vibrations of the bike on rough terrain. For summer riding you can get fingerless gloves so your hands don’t overheat, but you’ll want a pair with fingers for the coolers months.

A pump, puncture repair kit, and multi-tool

Punctures and their resulting flats are almost inevitable, so you should have the proper equipment and know-how to do a quick fix to at least get you home or to the bike shop. You should always carry a pump, repair kit, and multi-tool with you on your rides, whether in a saddle bag or in a backpack.

Clothing

The most important thing is to be comfortable in what you’re wearing. You may think a plain t-shirt would be the easiest thing, but as soon as it gets wet from rain or sweat, it’s going to become cold and clammy (not to mention the chaffing). You’ll want at least an athletic-specific top designed from a moisture wicking material. You should also always carry a windproof or rain jacket in case the weather takes turn!

As for shorts or pants, its a good idea to invest in a pair of bike shorts with padding. You could use your road cycling shorts, or there are mountain biking specific shorts with a more casual, baggy look.

The Technique

Perhaps the more drastic difference between mountain biking and road biking is in the technique. The key for mountain biking is to stay relaxed and flexible on your bike, as it’s going to jump around a lot more than you may be used to. If you are used to just sitting and spinning, this can be a bit of an adjustment.

You want to always be looking ahead on the trail towards what is coming up. Staring at your front wheel may work to get over some roots, but it’s also a good way to clip a tree.

Riding Downhill

Tip: Don’t do this.

When you hit a downhill, stand up on your pedals (keeping them level) and try get your weight to the back of the bike, pushing your hips backwards behind the seat if possible. Keep your legs and elbows bent with your body low to the bike. This will keep you from flying over the handlebars if you need to stop suddenly.

Climbing

If you see a climb coming up on the trail, you want to ensure you gear down well in advance. You want to try stay seated and spin in an easy gear when possible, as standing and pedaling hard can cause you to spin out and lose traction.

Riding through corners

Cornering can also be a bit of a challenge in the beginning, but they are a ton of fun once you get your technique down! You want to take control of your speed BEFORE you hit the corner so you can roll through it without touching your breaks. As with descending, you may want to stand on your pedals with your knees flexed as you lean into the corner.

Obstacles

Obstacles like rocks and roots are the reason for both the width and tread of mountain bike tires. They are built to roll over these things. So, it is more likely you’ll have to conquer the mental aspect of it rather than the physical. When you see an obstacle coming up on the trail, pick your route and exit point then commit to it mentally. Control your speed and try ride through without breaking. Make sure you are not resting all your weight on your handlebars, but instead keep your arms and legs flexed and your butt off the saddle, pulling your front wheel up to pop over the obstacle. Once you’ve done it a few times, it will become second nature.

Mountain biking for beginners can be a little overwhelming, but the learning curve is well worth it! Start off with some easy, rolling terrain, and you’ll be tackling those technical rides in no time.

10 Reasons to Start Early Morning Cycling Right Now!

April 11, 2020 by Sarah Lauzé

Picture this: open roads, golden light, just you and your bike conquering a climb or ripping down a descent. Sounds pretty great, right? Early morning rides may seem daunting, especially if you tend to wake up with a snarl on your face, head foggy, reaching for the nearest cup of coffee. Mornings may not come naturally to all of us, but there are a lot of things that make grinning and bearing the early morning alarm worth it. Here are just 10 reasons to start early morning cycling.

10 Reasons to Start Early Morning Cycling RIGHT NOW!

You’re a morning person.

If you are a shiny-eyed unicorn of a person that feels alive at 5am, then why aren’t you already doing this? If morning is your prime time, then get on your bike and make the most of it. It’ll be easier for you then it will be for the rest of us.

You’re NOT a morning person.

Seems counterintuitive, but here we are. Mornings may hit some of us like a brick to the head, but that’s actually a great reason to embrace the early morning ride. There’s no better way to make mornings suck less then doing what you love to do most: ride your bike. The first few weeks may be rough, but stick to a schedule and you may just find yourself starting to look forward to those early mornings.

Replace your coffee habit 

You’ve probably heard of magical endorphins. These little guys make us feel all sorts of great, and early morning workouts are known to get them going and give you that natural high (which is way better than coffee). Rather than relying on caffeine to do the trick, you will naturally get the blood pumping, waking you up and boosting your energy levels. Another bonus? You won’t experience the same crash that comes after caffeine, but you’ll find your mood and energy remain at higher levels for hours after your ride.

Quiet Roads

Less traffic means less stress out on your ride. The sense of isolation will allow you to enter a meditative state without the constant traffic noise or honking horns. You’ll also feel a lot safer with less cars on the road.

Cooler Temperatures

During the summer, riding in the heat can become almost unbearable. Early mornings are a great way to avoid the baking sun and heat stroke. Even if it’s still pretty warm, the sun will be less intense than it is later in the day.

Consistency

Over 90% of people that exercise consistently get it done in the morning. It makes sense, as it’s the one time of day that will remain largely untouched by other scheduled events and obligations (it’s not likely you’ll have a meeting scheduled for 5am). If you put it off until later, there’s a large chance it simply won’t happen.

Better Sleep

When you get out there and expose your body to those first few glimmers of morning sunshine, it can have an effect on your circadian rhythm (the internal cycle that governs sleep). Exercise combined with morning light can actually help you kick sleeping disorders such as insomnia. Getting up early will also help you reset your internal clock, making you more ready for sleep earlier at night.

Lose Weight

If you’re cycling to lose weight, the morning should be your time. Get out there before having breakfast, and you will have the added benefit of fasted cycling, which helps your body burn more of its fat stores. It also elevates your metabolism rate for the rest of the day, helping you continue to burn calories through the rest of the day. Keep in mind these should be shorter rides, as your body will not have the fuel for a long jaunt.

Sunrises are pretty

Sunsets are one thing, but sunrises are arguably more beautiful. Those first few rays of golden light are a sight to behold, and will do wonders for your mood for the rest of the day.

Set the tone for your day 

Have you ever noticed that if you start your day off with good decisions, those carry through into the rest of your day? We won’t go into the science, but making those first few disciplined decisions can make the rest of the decisions throughout your day easier. Getting your exercise done first thing can make eating healthy easier for the rest of the day, because the hardest part is already done. It’s a domino effect, and pretty soon you’ll feel like you can conquer just about anything!

Are you convinced to give it a try? Check out “How to get the best morning ride in” on how to plan for those first few early mornings!

8 On-the-Road Bike Repairs You Need to Know

February 20, 2020 by Sarah Lauzé

Cycling is beautiful for its simplicity, but that doesn’t mean things don’t go wrong. When you’re out on a ride and you get a flat or your chain breaks, it shouldn’t mean the end of your ride. Although these things can be fixed with ease back in your garage with all the right tools (or at your local bike shop), it’s important to learn some of the most common on-the-road bike repairs that will come up. Being stranded miles from home is no fun, and although it may be easier to call for a ride home, you’ve got what it takes to do a quick fix and keep riding!

On-the-Road Bike Repairs

Tools to Bring

You should be prepared with the right tools on the road or trail and know how to use them should a mechanical or flat tire occur. The tools to bring are:

  • Spare Tube
  • Pump or CO2 Inflator with an extra cartridge just in case.
  • Tire Levers
  • Patch Kit
  • Multi-tool with a chain tool on it

8 On-the-Road Bike Repairs

1. Fixing a Flat

If you ride a bike more than just around town you should know how to fix a flat. Fortunately it’s pretty easy:

2. Broken Chain

Broken chains don’t happen too often when riding but when they do, you’re not going very far until you fix it. A chain will either break completely or a link will become kinked. To fix it, all you need to do is to remove that link.

  1. First locate the broken link. There should be two plates that are loose, and flapping around or a link that has a bend in it. These are the ones that get removed. You do not need to remove the chain from the bike. Keep the chain threaded through the derailleurs if you can as it will save you time.
  2. Examine the chain breaker tool. You’ll notice a circular cradle that the push-pin moves through. Rest the link in this cradle where the pin lines up with the push-pin of the link you’re removing.
  3. Turn the push-pin to push the pin through and out the other side. If you’re using a master link, you will need to have both ends of the chain an inner link as the master link is an outer link. If you don’t have a master link or another connector pin, do not push the pin all the way out the other side of the chain. Leave it so the pin is over enough to remove the inner link but not so far that it falls out. This will be important in the next step. Now do the same one full link removed, one inner link followed by one outer link or vice-versa, from the pin you just pressed out with the broken link being in-between.
  4. If you removed the chain from the derailleurs, thread it back through being sure that it’s going the right way. Then place the chain in the smallest gear in the back and rest the chain to the inside of the chain rings on the front against the bottom bracket to give enough slack.
  5. Now install the master link if using one through both the inner links and lock into place. If you have a connector pin, line up the ends of the chain and press that through breaking off guide end with your chain tool. If using the same pin that you just pushed out and left on the outer link, line the end up and push the pin back in. You want it so both sides of the pin are flush with the outer plate of the chain. If you pushed the pin too far through when you were removing it, line the chain up in the chain tool and set the pin on the resting plate to then press the pin in. It may be a bit off at first but it should line up as you continue to push it through the hole.
  6. That’s it. The link with the pin you just installed may be a bit stiff but if you bend it laterally slightly with your fingers, it should loosen up to where you can’t even tell which link it was. The chain is now one link shorter, unless using a master link, but will still be good to go.
  7. One note is that reinserting a pin is now the week point of the chain. When you do make it home, take out that pin and put in a connecting pin which will better strengthen the chain. The problem is you may not be able to tell which link it was so it’s recommended that you replace the entire chain.

3. Tire Tear

A tear in a tire can end your ride. If it’s not extremely big however, you can fix it with a few little tricks. The first is the dollar bill trick where you fold up a dollar bill and place it between the tube and the tire where the hole is. This will only work if the hole is small enough. Once the hole is past a few millimeters in size, you are going to need a tire boot which should also be carried in your saddle bag. This rubber strip will be large enough to place over the hole and not allow the tube to poke out. The problem with both the dollar bill trick and the tire boot is that the tire can continue to split particularly if you’re on rough roads or terrain. Adding a piece of electrical tape in place of or in conjunction with, will help to hold the tire in place and not have the hole continue to grow.

4. Broken Spoke

First, you need to get the spoke out of the way so that it doesn’t interfere with your wheel turning. If you have a broken spoke on the front wheel, you should be able to just slide it out of the hub. If it’s on the rear wheel, bend the broken spoke around one of the spokes adjacent to it. Then you can adjust the tension on the rest of the spokes in your wheel.

To adjust the other spokes to accommodate for one missing spoke, you’ll need a spoke wrench, conveniently on many multi-tools, to tighten or loosen them by turning their nipples at the rim. Turn each spoke on either side of the one that just broke clockwise as if you’re looking from the hub of the wheel toward the rim. This will loosen those spokes. If this doesn’t move the rim back to center enough, ie. it’s still bouncing off the brake pads, go one more spoke in either direction and turn them counter-clockwise. This will tighten the spokes pulling the rim back toward the side of the broken spoke.  fIf the rim is moving too far to the right, you’ll want to either tighten the spokes that attach to the left side of the hub or loosen the spokes that attach to the right side of the hub. You’ll make this decision by testing the spokes and determining whether they feel too loose or too tight.

Never make drastic changes to the tension of a spoke at any one time. Just make half-turns with the spoke wrench each time and check and see how true the wheel is. It is easy to go too far. Once you get it roughly straight, you can ride the wheel. If the rim is still slightly touching the brake pads, open the brake quick-release to allow for more space. Once you get home, check out this article on how to finish up the repair.

5. Broken Front Derailleur Cable

With a broken front derailleur cable you are going to be stuck in the little ring for the rest of the ride. With a triple chain ring, you might be able to turn the limit screws enough to line up the derailleur up with the middle chain ring but it depends on your derailleur and set-up.

6. Broken Rear Derailleur Cable

With a broken rear derailleur cable you are going to be stuck in your smallest gear, normally an 11 or 12 tooth. To get the chain up to a bigger, easier gear, turn the H or high speed limit screw in as far as it can go. This should push the derailleur up at least a cog or two. You may have to back it back out a tad if it doesn’t line up well.

7. Broken Brake Cable

It’s going to be rare that you have a broken brake cable as they’re made not to fail. If you’re riding anything other than perfectly flat roads without many intersections or traffic you might be able to gingerly make it home otherwise it’s best to get a ride and not risk needing to stop quickly and not being able to.

8. Shifting Becomes Off

A lot of times, particularly after a new cable is installed, your rear derailleur shifting will become slightly off. This is because the cable stretched ever so slightly. To tighten it, simply turn the barrel adjuster on your derailleur counter-clockwise a quarter turn until the pulley wheel lines up exactly with the gear. You won’t have to turn it much unless it’s way off.

Cycling Terms for Beginners

February 16, 2020 by Sarah Lauzé

Riding a bike is simple right? It’s something most of us learn to do when we’re children, but all the cycling terms may not come as easily. When you’re first getting into cycling as an adult, you may think you know all there is to know. Swing your leg over the seat and start pedaling. Easy peasey.

However, the problem will arise when you start heading out on group rides, or have to take your bike into the shop. You can only refer to your sprockets as “thingamajigs” so many times before someone shakes their head at you. It may be time to learn the talk if you’re going to walk the walk, so here is your guide to cycling terms for beginners.

The Bike Basics

Brakes – They may come in a variety of styles, but the main idea is to keep you from running into cars or other harmful objects. As your one and only stopping force, your brakes are important to your safety on the bike. The left brake typically slows the front tire, so be careful not to just hit that one or you may do an endo (see below).

Chain – The bike chain is the main mechanical driving force of your bike. It is made up of chain links that encircle the gears and make the wheels spin.

Crankset – A part of the larger drivetrain, the crankset is the front set of sprockets closest to the pedals. It is the crank arms (attached to the pedals) that rotate them.

Cassette – The cassette is the set of sprockets on the rear wheel, driven around by the bike chain. The chain moves up and down the cassette as the rider changes gears.

Gears – Ah yes, the magical gears. Most bikes have two sets of gears, one at the rear of the bike (the cassette) and one at the front (crankset). These are what adjust how hard you have to pedal to cross the terrain (smaller gears for climbing and bigger gears for flats).

Cog – As one of the rings in the cassette, a cog is also known as a sprocket or gear. The whole set is called a cassette or cogset.

Fork – The split part of the bicycle that holds the front wheel in place.

Frame – Also known as the backbone of the bicycle, the frame is what brings all the parts together. Usually hollow and made from lightweight material, it is the most important feature to finding the right bike. Ensure the frame fits you properly as it plays into your riding efficiency, posture, and overall comfort on the bike.

Hub – Where the rotation happens. The hub is the center of a bike wheel that allows you to roll smoothly along your way.

Lube – Lube is what keeps the moving parts of a bicycle, well, moving. Don’t leave home without the lube!

Granny Gear – No offence to your Granny, but this is her go-to gear. As the lowest gear ratio possible, this will be easy spinning on flats, but comes in real handy when it comes to those climbs.

Spokes – You know those metal toothpicks that go from the center of the wheel (or hub) to the edge of your wheel rim? Those are spokes! They are small but mighty, and provide strength and support for your weight on the wheel.

Saddle – No, you’re not going horseback riding (if you are, you’re on the wrong website). The bike saddle, aka the beat seat, is one of the most important factors in your overall comfort on the bike, so choose wisely!

Beater – It may have seen better days, but that doesn’t mean it’s seen its last mile. Beater bikes are often used for commuting, or when you need an excuse on Strava for your embarrassingly slow time. “I was on my beater!”

Fixie – Aka fixed gear, a fixie is a bike with just one gear. That’s right, one gear. Oh, and they often don’t have brakes or the ability to freewheel, which means whenever the bike is moving, so are the pedals.

The Tire Basics

Tubeless – The name pretty much spells it out for you. Tubeless tires don’t have the inner tube that the clincher set up has, and instead the tire is mounted tightly to the rim using the combination of pressure and liquid sealant. The plus side is – no pinch flats!

Tubular – An almost entirely race specific tire option, tubular tires are glued to a V-shaped rim. They are ultra light, but a absolute pain to fix. Most racers choose to replace the entire wheel rather than attempt mending.

Clincher – The classic tire design that consists of a U-shaped rim and open tire casing with a replaceable inner tube inside.

Presta – A style of valve often referred to as the “French valve” that is most common on high pressure road bike inner tubes. It’s made up of an outer valve stem and an inner valve body.

Schrader – Presta’s arch nemesis, the Schrader or “American valve” is a pneumatic tire valve that’s found on most tires (including cars).

PSI – Pounds per square inch, PSI is the amount of air pressure in the tire. Be sure to check out the manufacturer’s suggested PSI before pumping up your tires!

Flat – A good way to ruin a ride if you aren’t prepared, a flat is usually a relatively easy fix. They happen to the best of us, so be sure to have an extra tube (if you have clincher tires) and a hand pump with you at all times.

Pinch Flat – The bane of clincher tires, pinch flats happen when the tube inside the tire gets stuck between the outer rubber tire and the rim. These punctures happen most often when running lower tire pressure.

The Gear Basics

Clipless – Counterintuitive to their name, clipless pedals consist of a cycling shoe with a cleat that “clicks” into the pedal. The name comes from the older toe clip model, which had a little cage that went over your toes, so compared to that, they are clipless. They allow for better power transfer and pedaling efficiency.

Kit – The whole cycling outfit, a kit consists of the jersey, shorts, bib, and the socks in some cases. The more you match, the faster you are…right?

Jersey – Cycling specific jerseys are usually made from a sweat wicking material, have a zip up front, and pockets in the back for all your energy gels.

Pannier – A pannier is a bag that you attach to your bike to carry your gear while commuting or bike touring.

Bibs – Suspenders never went away in the cycling world. Bibs are cycling shorts that have a bib (like overalls) rather than a waistband. The appeal – look awesome and eliminate the chance of waistband chaffing in the bent over cycling position.

Chamois (or shammy) – You’re going to want to practice the pronunciation here, because you definitely don’t want to say it wrong (rooky mistake). It’s said “sham-wah,” and refers to the lovely pad in the seat of cycling shorts that literally saves your ass. It may sounds gross, but you also don’t want to wear underwear with a chamois as they can cause chafing.

Lid – Your most important piece of gear, don’t leave home without your lid (aka helmet).

The Rider Basics

Attack – Sounds aggressive, and it usually is. Attacking it a sudden attempt to pull away from a rider or group. If you go for it, you better mean it.

Bonk – We’ve all heard of hitting the wall, when you have no energy left due to a very real glycogen depletion. The dreaded bonk comes in the form of muscle cramping, mental fogginess, or the physical inability to go any further.

Cadence – You’re going to hear this one a lot. Cadence refers to the number of revolutions per minute or pedal rate. There’s no magical number (the jury is still out), but generally speaking stronger riders will be more efficient at a higher cadence.

Roadie – Your new nickname! A roadie refers to a dedicated and awesome road cyclist.

Bikepacking – Bikepacking is a way of long distance bicycling that includes strapping all necessary supplies right on your bike frame (rather than over-rack panniers). Bikepacking allows riders to tackle more diverse terrain, largely cross country trails,

Chasers – We’re not talking about the chaser you’ll find at a bar. Chasers are riders in a race that sprint away in pursuit of the lead rider.

Drafting – Cycling close behind the rider ahead of you to block the wind, reducing your energy output by up to 30 percent. Just be sure to take your turn in the front.

Endo – That moment when you flip over your handlebars. Ouch.

LSD – Not the drug! LSD stands for “long slow distance” and accounts for those endurance building rides where you spend hours in the saddle at a consistent aerobic pace.

Hammer – Hammer hard! Hammering is pedaling hard on the big gears, offering the greatest resistance and packing the most power. Get ready for the burn.

Road rash – Unfortunately, skin + road = road rash. It is the scrapes and bruises that you get from a tumble onto a paved or dirt road. Yes, you’ll look hardcore, but it’s also extremely painful.

RPM – Rotations per minute, your RPMs measure your pedaling rate (aka cadence).

Pull – Taking your turn at the front of a line of riders so they can draft behind you is to “take a pull.” It is a tactic used by groups for each rider to take a turn, switching out often for maximum efficiency, especially when there’s a strong headwind.

Watt – The unit of measurement for power, this is how much strength your putting into every part of a pedal rotation. The more efficient your pedaling and the stronger your are, the greater the power or wattage.

Bunnyhop – Probably the first trick you learned on your bike, the bunny hop is the classic jump and lift with your bike to hop an obstacle or curb.

Century – A 100 mile (or kilometer) race or ride that are very popular in the cycling world.

Grand Tour – Have you heard of the Tour de France? Well, the epic race through France is one of three Grand Tours, the other two being the Giro d’Italia and Vuelta a España. They are all three weeks in length, and involve back-to-back days totalling over 2,000 miles or 3,000 kms.

Time Trial – A race against the clock, a time trial is often a staggered sprint race.

Next Page »
  • Facebook
  • Google+
  • Tumblr
  • Twitter

Latest Articles

Who Invented the Bicycle?

October 6, 2020 By Sarah Lauzé

What size bike do I need?

October 4, 2020 By Sarah Lauzé

The Number of Calories Burned Cycling

October 1, 2020 By Sarah Lauzé

The Benefits of Cycling for Your Mental Health

September 9, 2020 By Sarah Lauzé

Symptoms of Bad Bike Fit

September 8, 2020 By Sarah Lauzé

How to Choose the Best Cycling Jersey

September 2, 2020 By Sarah Lauzé

Useful Info

  • Contact
  • Finally, A Global Cycling Club That Is Focused On Community And Love Of Cycling!
  • Share Your Story!
  • Terms And Conditions Of Use
  • Welcome to I Love Bicycling
  • What Happened When I Stretched Every Day For a Month

Recent Posts

  • Who Invented the Bicycle?
  • What size bike do I need?
  • The Number of Calories Burned Cycling
  • The Benefits of Cycling for Your Mental Health
  • Symptoms of Bad Bike Fit

Search I Love Bicycling

Connect with Us

  • Facebook
  • Google+
  • RSS
  • Tumblr
  • Twitter

Copyright © 2021 · Magazine Pro Theme on Genesis Framework · WordPress · Log in