Doing anything yourself is more rewarding than using the factory made, corporate version of whatever you need. Homemade energy bars give you that good feeling of doing it yourself and the chance to accommodate your tastes and nutritional needs. You will also impress your riding friends when you pull them out mid-ride. At first they will balk at the idea until you give them a taste.
Getting the Right Nutrients
During the course of any endurance activity, you will need carbohydrates to sustain your energy levels. Your homemade energy bars will need to have a base full of carbohydrates to give you the quick, accessible energy that your body requires; this will be the majority of the energy in your bars. Along with the carbohydrates, your bars should have some fat and protein to provide longer term energy and provide the full spectrum of available calories.
Using the Right Ingredients
A tremendous benefit of homemade energy bars is that you know exactly what your ingredients are. There is no bar wrapper with undecipherable or unknown ingredients. There is no mystery of how the bar will taste when you pull it off of the shelf. You can also ensure that you there are no potential allergens and that everything is easily digestible for you; no off the shelf bar is personally tailored to your needs.
You can also make offbeat flavors and use unique ingredients. Once you have the basic recipe down, feel free to experiment and get creative with your ingredients.
The Basic Recipe
Ingredients:
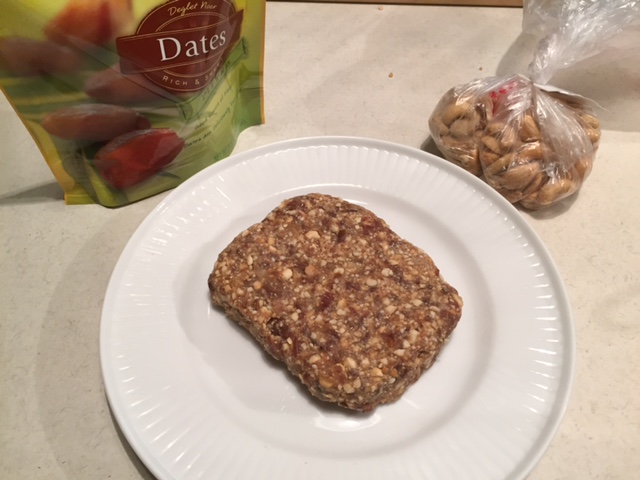
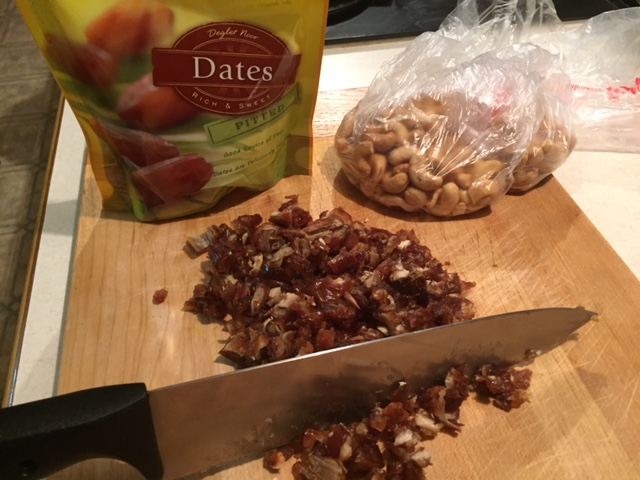
- 1 1/4 cups dates
- 1 cup cashews
You will need a cup and a quarter of dates (the softer the better – Medjool are the best. Pitting them at home usually gets you a better date too) and a cup of raw cashews (if you are allergic to nuts, sunflower or pumpkin seeds are a good replacement). Put the dates in a food processor and process until they turn into a ball rolling around on the blade. Put the ball and any scraps in the processor in a bowl. Now process the cashews until they are fully ground but before they turn into a fine flour. Put the cashews in the bowl with the dates. If you don’t have a food processor you can do it the manual way with a cutting board and chopping knife. You won’t get the dates and cashews cut up quite as small but they will still work just fine.
Knead the dates and cashews together in the bowl. At first it may seem like they will not hold together. Keep going until the mixture is no longer sticky and you can form it into a loaf. Place the loaf in the refrigerator for a few hours to solidify. Remove from the refrigerator and cut into bars. Another convenience of homemade energy bars is that you can cut them to whatever serving size you would like.

This recipe is easy to double or triple, depending on the capacity of your food processor or your patients to do multiple batches in your food processor.
Additional Recipes
Once you have mastered the basic recipe, it is time to make different flavors and also to experiment on your own. The key to experimenting is to substitute sticky ingredients with sticky ingredients and dry ingredients with dry ingredients. A crowd favorite are mint chocolate bars. Substitute an eighth of a cup of cashews for an eighth of a cup of cocoa powder and add an eighth of a teaspoon of mint extract oil to the cashews. The rest of the recipe remains the same.
Moving on to a complex recipe (which is only complex compared to the basic recipe; these are all pretty simple), you can make a carrot cake flavor. Shred an eighth of a cup of carrots and squeeze out as much moisture as possible. Add a quarter of a cup of raisins and seven-eighths of a cup of dates and process. If the mixture does not seem sticky enough, add a few more dates. Now substitute half a cup of walnuts or pecans for half of the cashews and process with a half of a teaspoon of cinnamon. This may take extra kneading to work out the moisture and form a nice loaf.
Homemade Energy Bars for the Win
Homemade Energy Bars leave you feeling great in a lot of ways – the satisfaction of making something yourself, the energy they provide, the delicious taste, envy of your friends and the healthy choice you made. That is worth sacrificing a little of your time for, right?
An I Love Bicycling Extra – How To Wrap Your Homemade Energy Bars
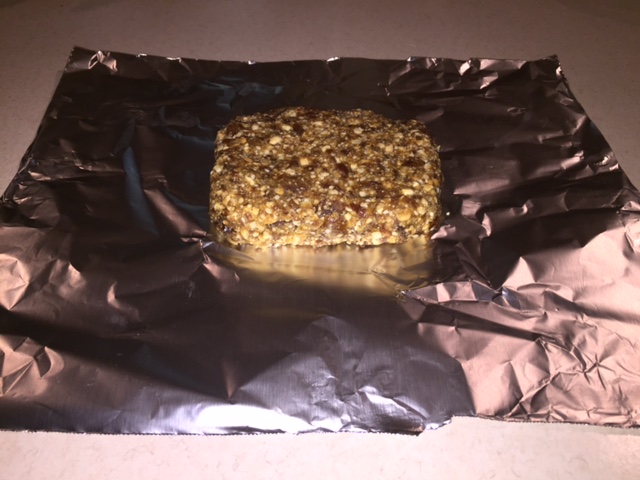
Step 1: Place the bar in the center of a piece of aluminum foil.
Step 2: Fold in one of the long sides to the center of the bar. You can optionally fold back about 1 cm to create a better seam.
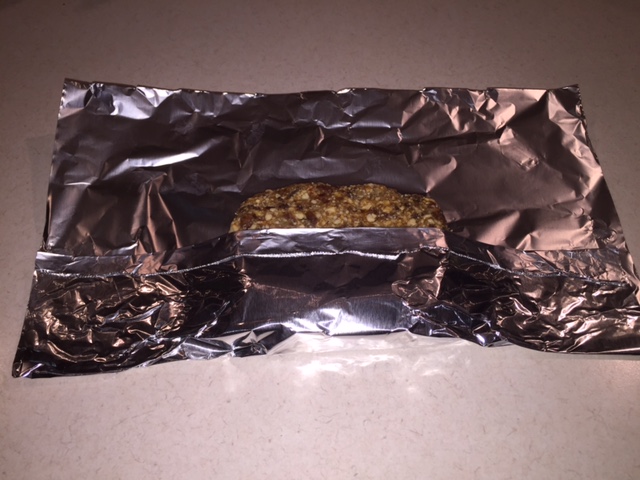
Step 3: Fold over the opposing side to the center overlapping by one to two centimeters. Also, fold back the center to create a better seam.
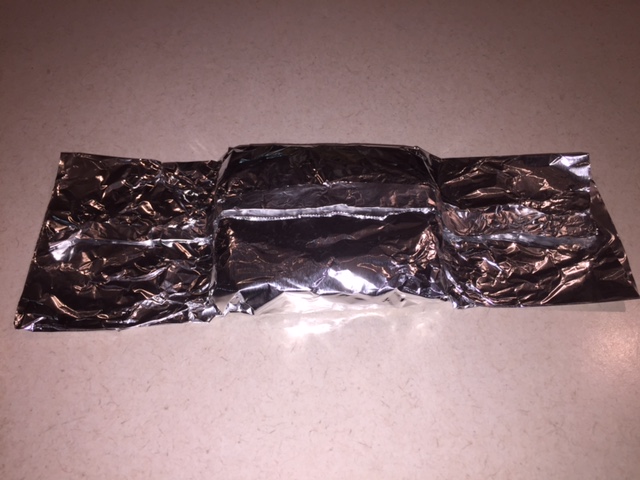
Step 4 & 5: Fold one end and then the other underneath the bar on the opposing side of the seam.
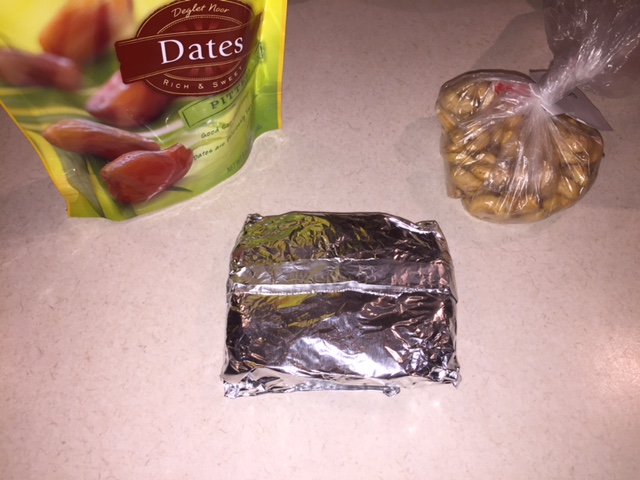
Step 6: Open by only undoing one end of the bar and separating the seam. Then enjoy.